Using your Pi as a server
There's lots of project you can do on a Raspberry Pi but first you need to set it up ready to take on whatever you have planned.
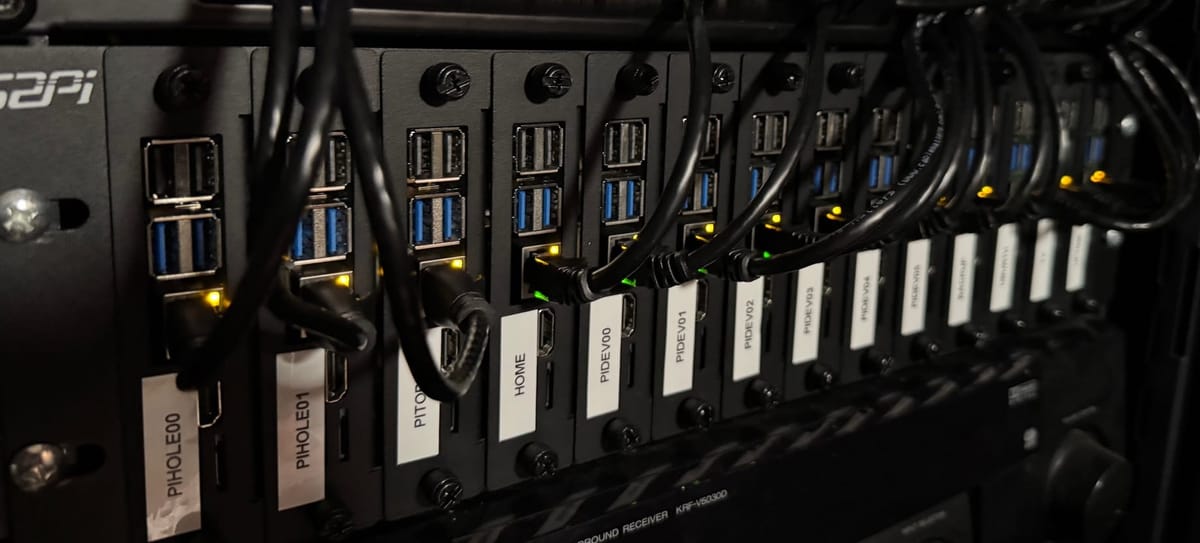
The raspberry Pi 5 is a nice little SBC (single board computer) and you can have some great fun with it. However, what if you have humble needs for a server? Will the Pi be enough? Well the good news is that yes, it will! Whether you are a running a small business and need an internal server, a home lab or server to learn on, a small website, social media server, or a home media server, the Pi 5 can serve your needs and make a great cost effective solution.
In this article I want to go through the basics of setting up your Pi ready to be a server and how to get the most out of it. After completing this guide you'll need to install whatever software you need and I'll be writing lots of guides for lots of use cases, so make sure you SUBSCRIBE (it’s free).
Hardware needed
- Pi (recommended Pi 5 at least 4GB+)
- Case (many options here)
- Power Supply (27w)
- SD card (or follow the upgrade guide to SSD)
I highly recommend the suppliers https://thepihut.com and https://shop.pimoroni.com. I'm not affiliated with these companies but I've had great service from them in the past and bought many things from them.
Preparing your Pi
Let's get down to the detail of setting up your Pi. We are going to install the base OS and set up remote access from the get go. My philosophy is to run the Pi with as little as needed. This not only saves resources (CPU, RAM, disk space) but the less software you run, the more you reduce your attack area and increase your security.
Put the OS on a diet
So some of you will know there are a few flavours of Raspberry Pi OS. You have the 64bit and 32bit versions and if you're running a Pi 3 or higher just go for the 64bit version. But what you may not know is there is a lite version of both of these. The lite version does not contain a Desktop environment, so there's no point and click, it’s all command line, but this isn't as scary as it seems, as Raspberry Pi OS is based on Debian Linux which has a brilliant packaging system called apt, which makes it easy to install and update software.
Lets start by preparing the SD card for your Pi:
Fire up the official raspberry pi imager and let’s tweak some settings. First, you’ll need to select which hardware you have and then click "Choose OS".
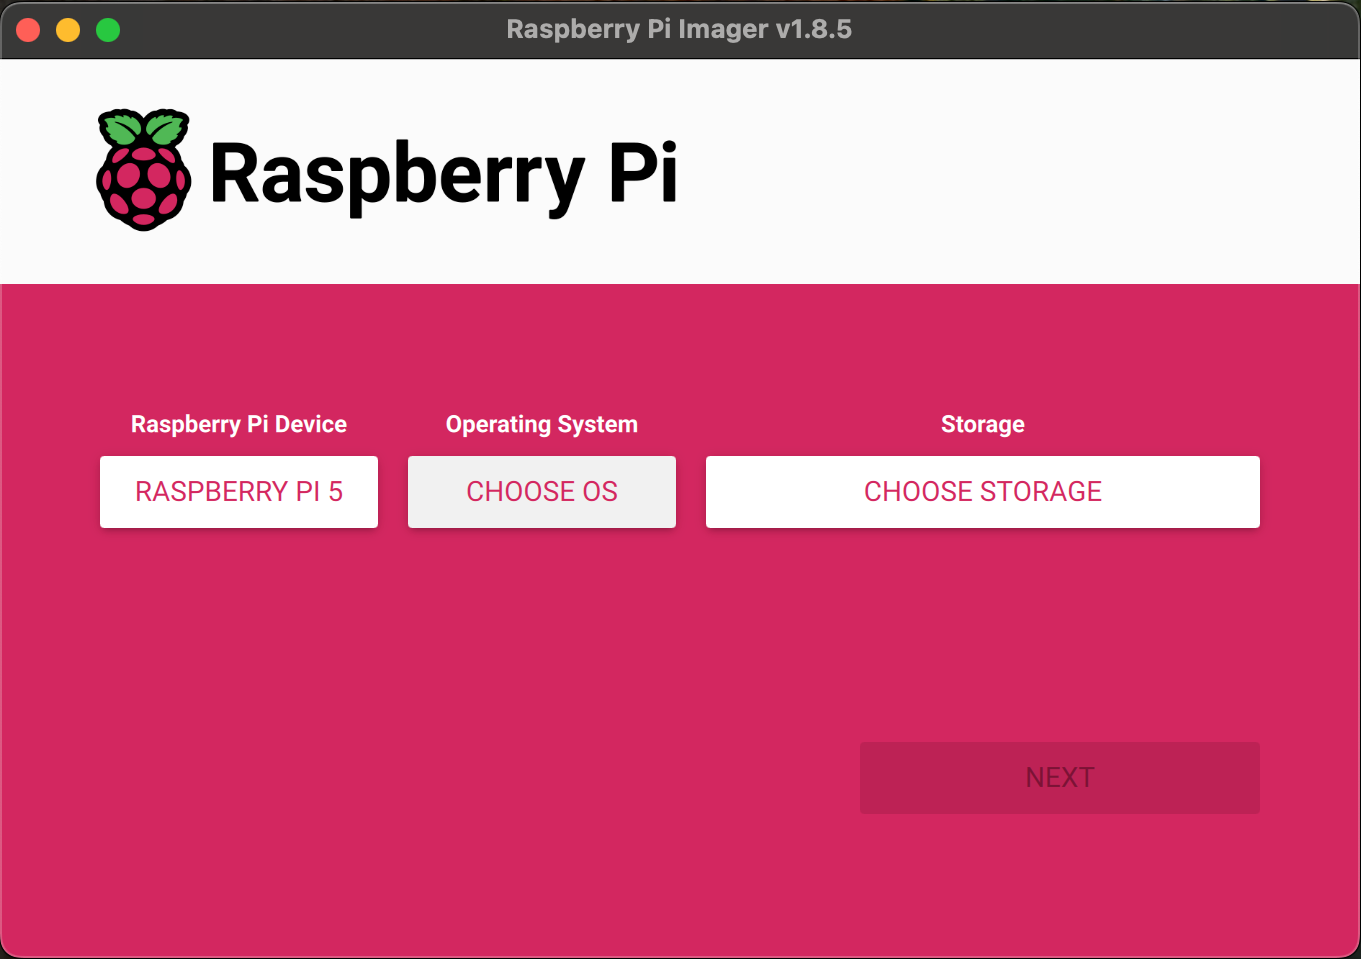
This is where we need to deviate from the default, which installs the full desktop version of the OS.
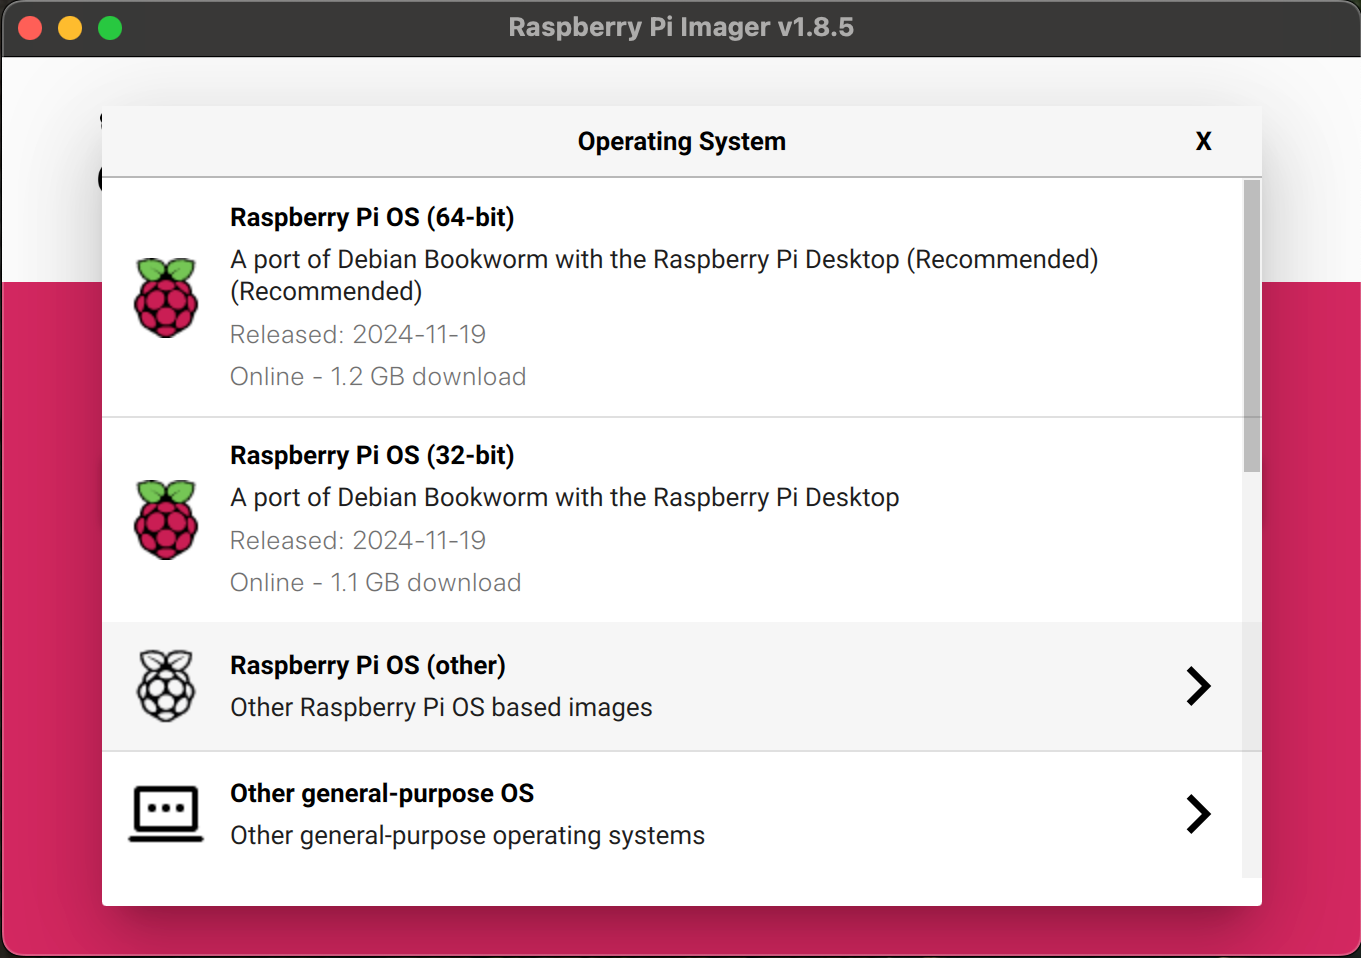
So, scroll down to the third option which should say "Raspberry Pi OS (other)" and click on that.
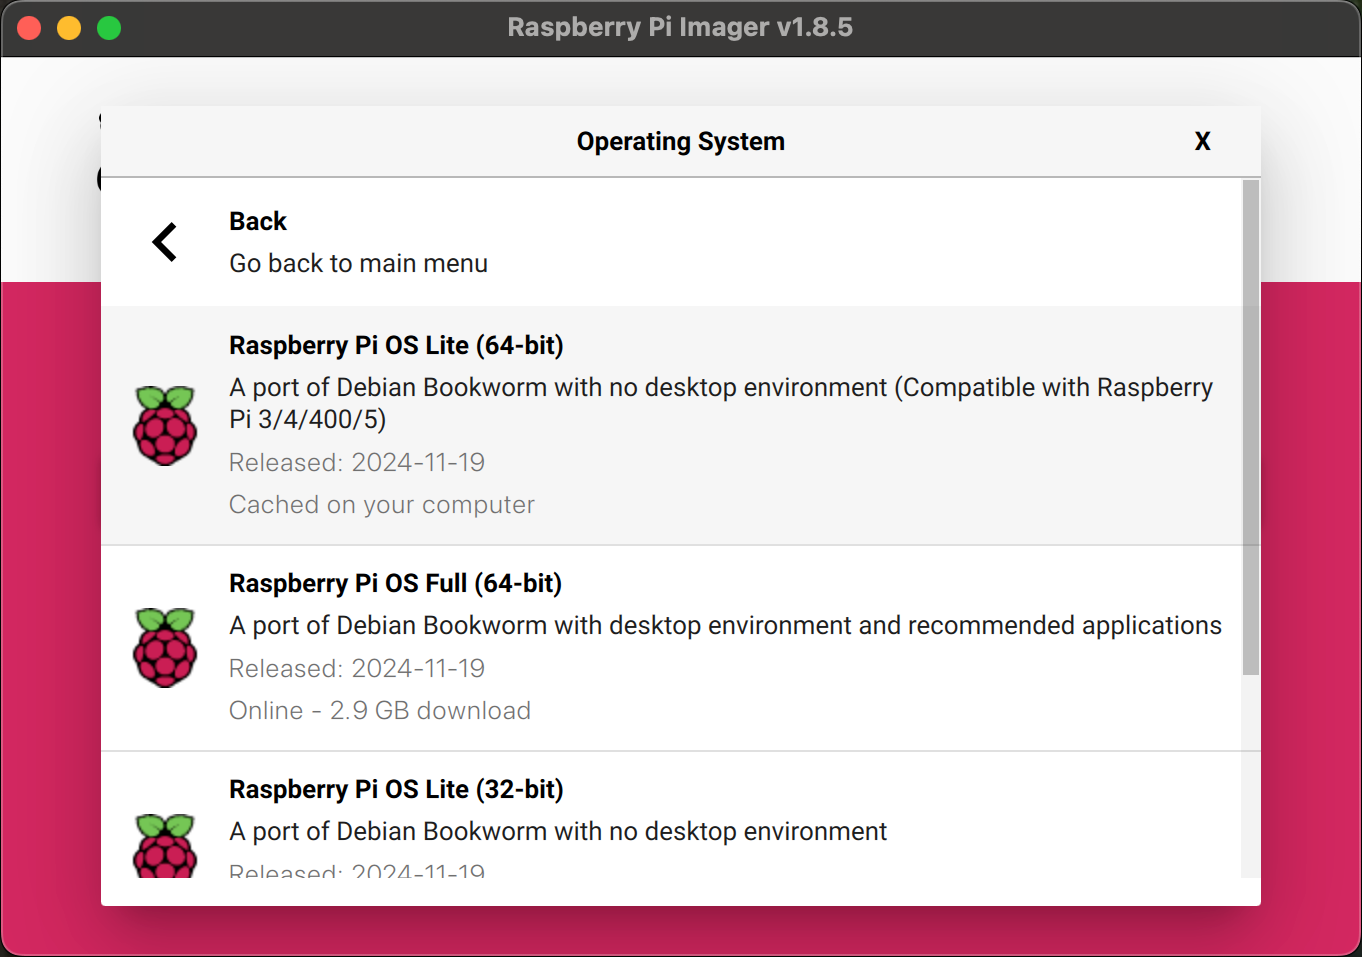
This is where you'll find the lite versions of the image hiding. Like I mentioned, if you're using a Pi 3 or higher, choose the "Raspberry Pi Lite (64 Bit)" option, otherwise scroll down and pick the 32 Bit Lite option.
Now you are ready to pick your storage and write this image to the disk, but I recommend you tweak some setting before writing to the SD card. You do this by clicking the ‘edit settings’ option on the pop up, but first you'll need to carefully select the SD card as the destination target for the OS (this should now be inserted into you main PC)

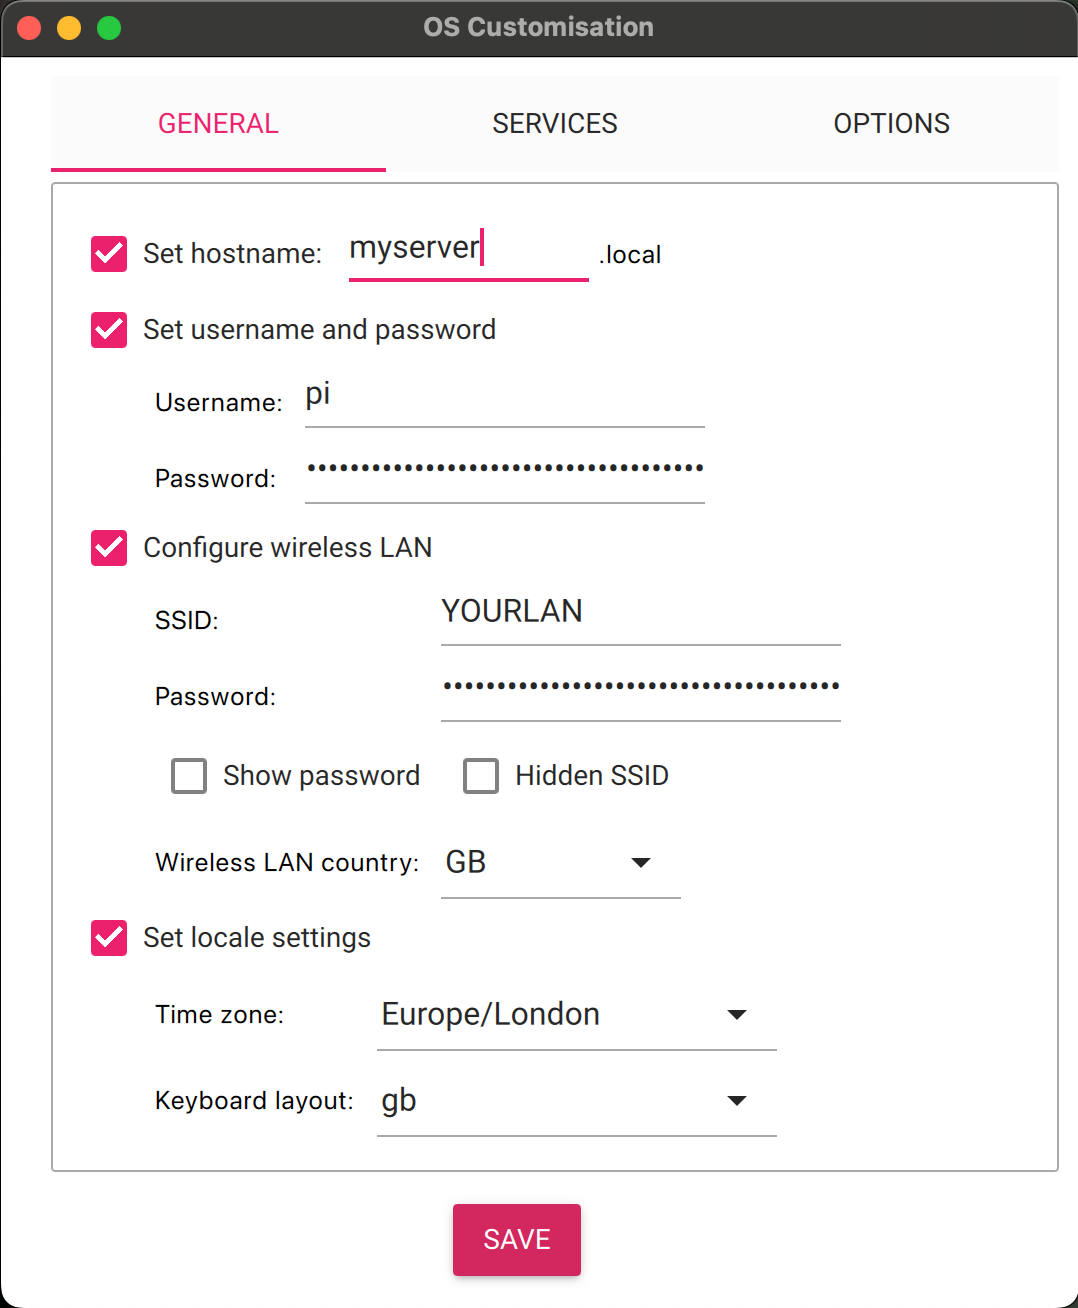
Now you can go ahead and set things such as:
- hostname (this will be useful later for connecting)
- a username
- a password
- Wifi connection details (if you're not using ethernet)
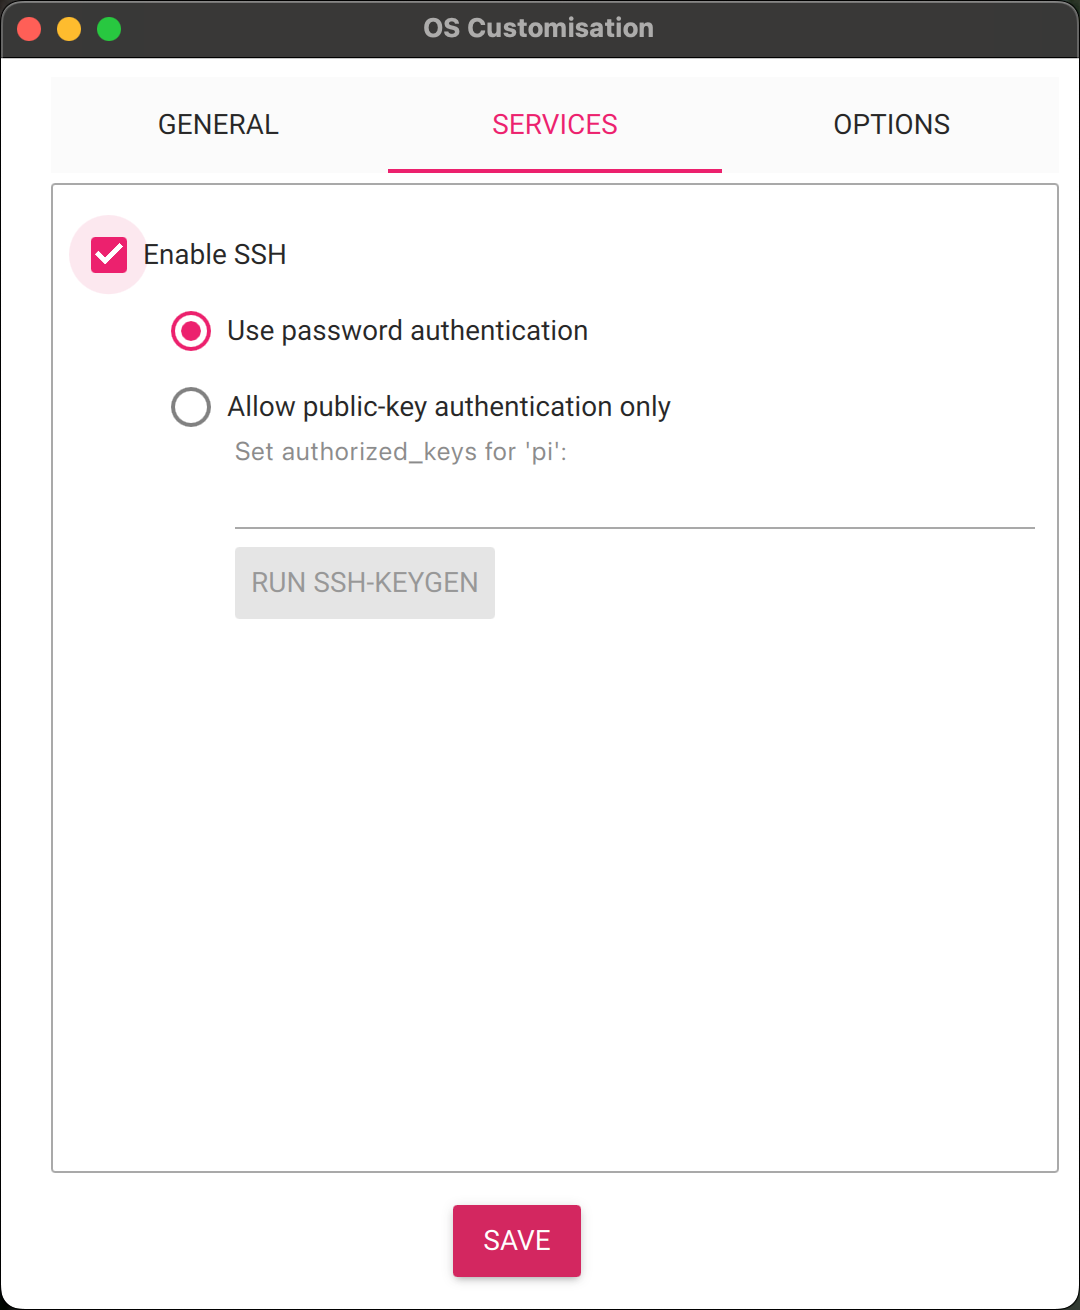
Before you click save you should now click on the "Services" tab at the top. In here we are going to make sure SSH is enabled and you have password authentication ticked. If you're used to using SSH and already have a key, you could go ahead and paste your public key here if you wanted.
Hit the save button and you will be ready to write the media to your SD card - you may be prompted for your username/password for your main PC to give it permission to write the card but this is all ok!
Put the Pi together and boot it up
Once you've fitted your Pi in the case installed the SD card and plugged it into the network (if you are using ethernet) it's time to logon to your Pi remotely. For this we are going to use SSH. On Linux or Mac you can just use the terminal and ssh directly to your Pi. On Windows you can download "Putty" which will allow you to connect to your server in a similar way.
👉 Note
In the example below we are connecting to pidev00.local but this will be different for you and will be the name you gave the server when writing the image! Also, if you are on Windows, you may need to install the ‘bonjour’ protocol so you can resolve the host.
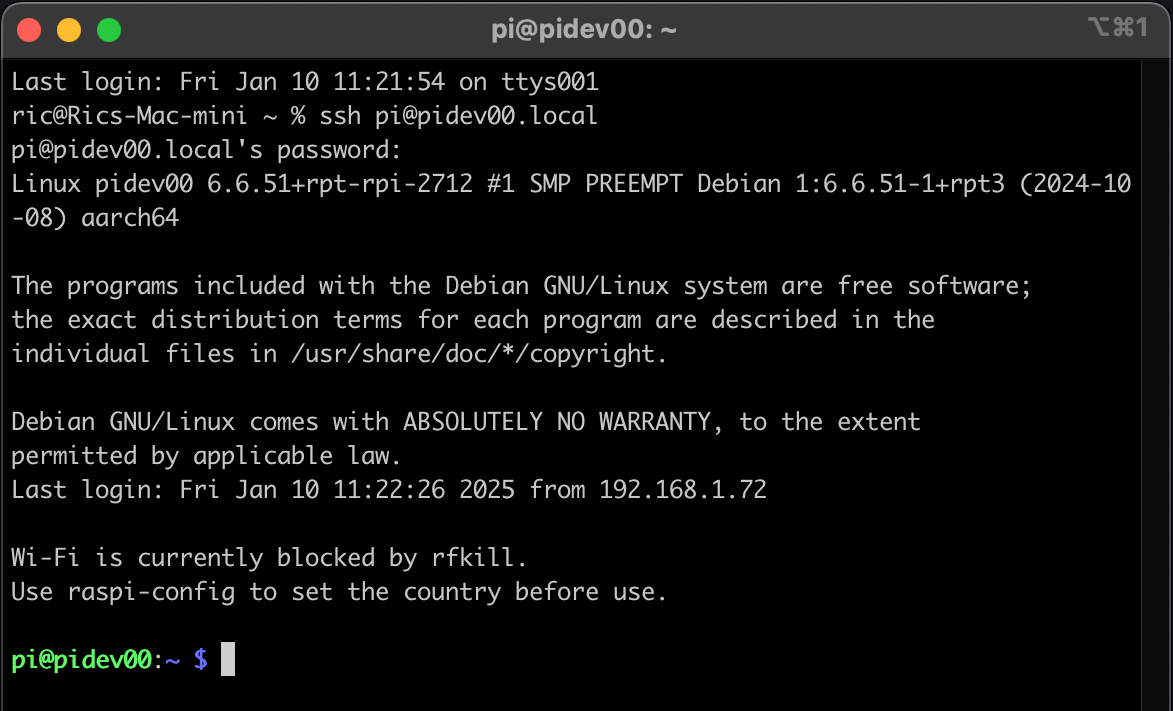
Below you can see I'm connecting as the user pi @ pidev00.local. This will then prompt me for a password.

Enter your password and you'll be greeted with a login which now means you're ready to go and can start running commands. The first time you go to login you may get asked to verify the host key, just answer yes to this and you won't get prompted again.
Set a static IP
Another thing you may want to do on your Raspberry Pi is set a static IP, this way you always know where to connect. It's really a convenience thing, but if you're happy with bonjour and using a .local address, don't worry!
Using your router to set a static IP
You can do this in a couple of ways. Possibly the easiest is if you can log into your router on your home network. If you can, you need to find the MAC address of your Pi, this should be in the format AA-00-04-00-XX-YY.
You can run on the terminal:
ip aThis will give you lots of output but have a look under eth0 (for wired connection) or wlan0 (for wireless) and you'll get a line like this:
link/ether d8:3a:dd:d6:6f:94Now head to your router login page and assign a static IP address for that MAC address in your settings, all routers differ but it shouldn't be too hard to find and is normally with the DHCP settings. Now when you reboot your Pi it will always get the same IP address assigned from the router.
Configuring a static IP on the Pi
Raspbian Buster static IP is set a little bit differently from how it was done in Raspbian Jessie. We now use the "/etc/dhcpcd.conf" file to configure a static address rather than the old interface file.
To set the Pi's static IP, use your favourite text editor and open up "/etc/dhcpcd.conf". I would use vi but nano is also an option.
sudo vi /etc/dhcp.confScroll down until you see the line static "ip_address=", then uncomment that line by removing the # at the beginning of the line. Now edit the line with the IP and interface you want to set, remember eth0 for ethernet and wlan0 for WiFi. This example assumes your network is in the 192.168.0.0/24 range, which is pretty common, but check your settings.
interface eth0
static ip_address=192.168.0.200/24
static routers=192.168.0.1
static domain_name_servers=192.168.0.1
Now save your config and reboot. once the Pi is up and running again it should be assigned the static IP. Look out for IP clashes on your networking - don't give it an address that other systems are using. It's a good idea to set it to an address that your router doesn't give out with DHCP.
If you don't want to use your ISP's DNS server, you can always change the "static domain_name_servers" value to something like Cloudflare (1.1.1.1) or Google (8.8.8.8) or, even better, if you're running PiHole, point it to that!
Ready to go!
Now you are ready to go and over the course of this blog I'm going to bring you LOADS of projects you can run on your Pi, whether its just for testing, development or even running in a small office as production. Be sure to SUBSCRIBE and look out for more articles soon, and if you want to support my work you can even donate!


