Wait! Oh yeah, wait a minute Mr Postman!
Sometimes when you’re developing a website or service you need to test email but you don’t want to hook your dev environment up to a full blown mail server because, well, Dev Happens! The good news is this is really easy to do with a program called mailhog!


Sometimes when you’re developing a website or service, you need to test email but you don’t want to hook your dev environment up to a full blown mail server because, well, Dev Happens! Not only do you not want to send out erroneous messages from your dev server, you might want to be able to see what those emails actually look like for the recipient, to avoid those embarrassing Dear %NAME% type emails!
The good news is you can do this really easily with a program called mailhog. Looking at the GitHub repository you might think, hmmmm, this hasn’t been updated in years, but in reality it doesn’t need to be, smtp (the mail sending protocol) hasn’t changed in years either and the rest of the project is just a simple web UI for you to see the email that’s been sent. The only thing the original image was missing was support for arm64 processors, so I rebuilt it for you. Let’s look at how to get this set up.
Setup
Connect to your Pi server via SSH (hopefully you’ve installed your base system, but if not check out this handy guide, and this one to get docker running). Now, it’s likely you’ll be running a few services on your Pi so this guide also assumes you’ve installed Traefik to be a reverse proxy. And we are going to connect mailhog to that.
Configure traefik
You’re going to need to add an extra port to traefik’s configuration that’s TCP-based to accept email. In order to prevent this interfering with any other mail services you might be running, we’ll run it on port 1025. Here’s how to add the extra port:
cd /opt/containers/traefik/data
sudo vi traefik.yml
Now edit the entryPoints section and add a new port to it (port 1025). Mine looks like this:
entryPoints:
  web:
    address: ":80"
  websecure:
    address: ":443"
  ssh:
    address: ":222"
  mailhog:
    address: ":1025"
Now save the file (in vi you press esc :wq) and restart Traefik
cd /opt/containers/traefik
sudo docker compose down
sudo docker compose up -d
Create the directories and files you need
Let’s create the directory in which to store the mailhog docker compose file neatly.
sudo mkdir /opt/containers/mailhog
cd /opt/containers/mailhog
Now we’ll create the docker compose file called compose.yml in that directory.
sudo vi compose.ymlYou’ll need to copy the content from below and paste this into the file, but be aware to change the <YOU_DOMAIN> to match your internal DNS. Mine is set to mailhog.internal.pisource.org, for example.
services:
  server:
    image: richarvey/mailhog:latest
    container_name: mailhog
    restart: always
    networks:
      - mailhog
      - traefik_proxy
    labels:
      - traefik.enable=true
      - traefik.http.routers.mailhog.entrypoints=web
      - traefik.http.routers.mailhog.rule=Host(`mailhog.<YOUR_DOMAIN>`)
      - traefik.http.middlewares.mailhog-https-redirect.redirectscheme.scheme=https
      - traefik.http.routers.mailhog.middlewares=mailhog-https-redirect
      - traefik.http.routers.mailhog-secure.entrypoints=websecure
      - traefik.http.routers.mailhog-secure.rule=Host(`mailhog.<YOUR_DOMAIN>`)
      - traefik.http.routers.mailhog-secure.tls=true
      - traefik.http.routers.mailhog-secure.tls.certresolver=myresolver
      - traefik.http.routers.mailhog-secure.service=mailhog
      - traefik.http.services.mailhog.loadbalancer.server.port=8025
      - traefik.tcp.routers.mailhog-smtp.entrypoints=mailhog
      - traefik.tcp.routers.mailhog-smtp.rule=HostSNI(`*`)
      - traefik.tcp.routers.mailhog-smtp.tls=false
      - traefik.tcp.services.mailhog-smtp.loadbalancer.server.port=1025
      - traefik.tcp.routers.mailhog-smtp.service=mailhog-smtp
      - traefik.docker.network=traefik_proxy

networks:
  mailhog:
    external: false
  traefik_proxy:
    external: true
Now save that file with esc :wq and you are ready to run mailhog.
Running Mailhog
Running is super simple, be sure you have restarted Traefik and then simply run:
cd /opt/containers/mailhog
sudo docker compose up -d
Update your DNS
Now don’t do what I just did and try and browse to the site before setting up your DNS, otherwise you’ll end up having to flush your DNS cache! Head to your DNS server of choice, it might be PiHole which is something I use, but whatever it is you need to setup a CNAME and point mailhog.<YOUR_DOMAIN> to traefik.<YOUR_DOMAIN>, (obviously) substituting <YOUR_DOMAIN> for your actual internal DNS name.
Browse to Mailhog + Set up SMTP
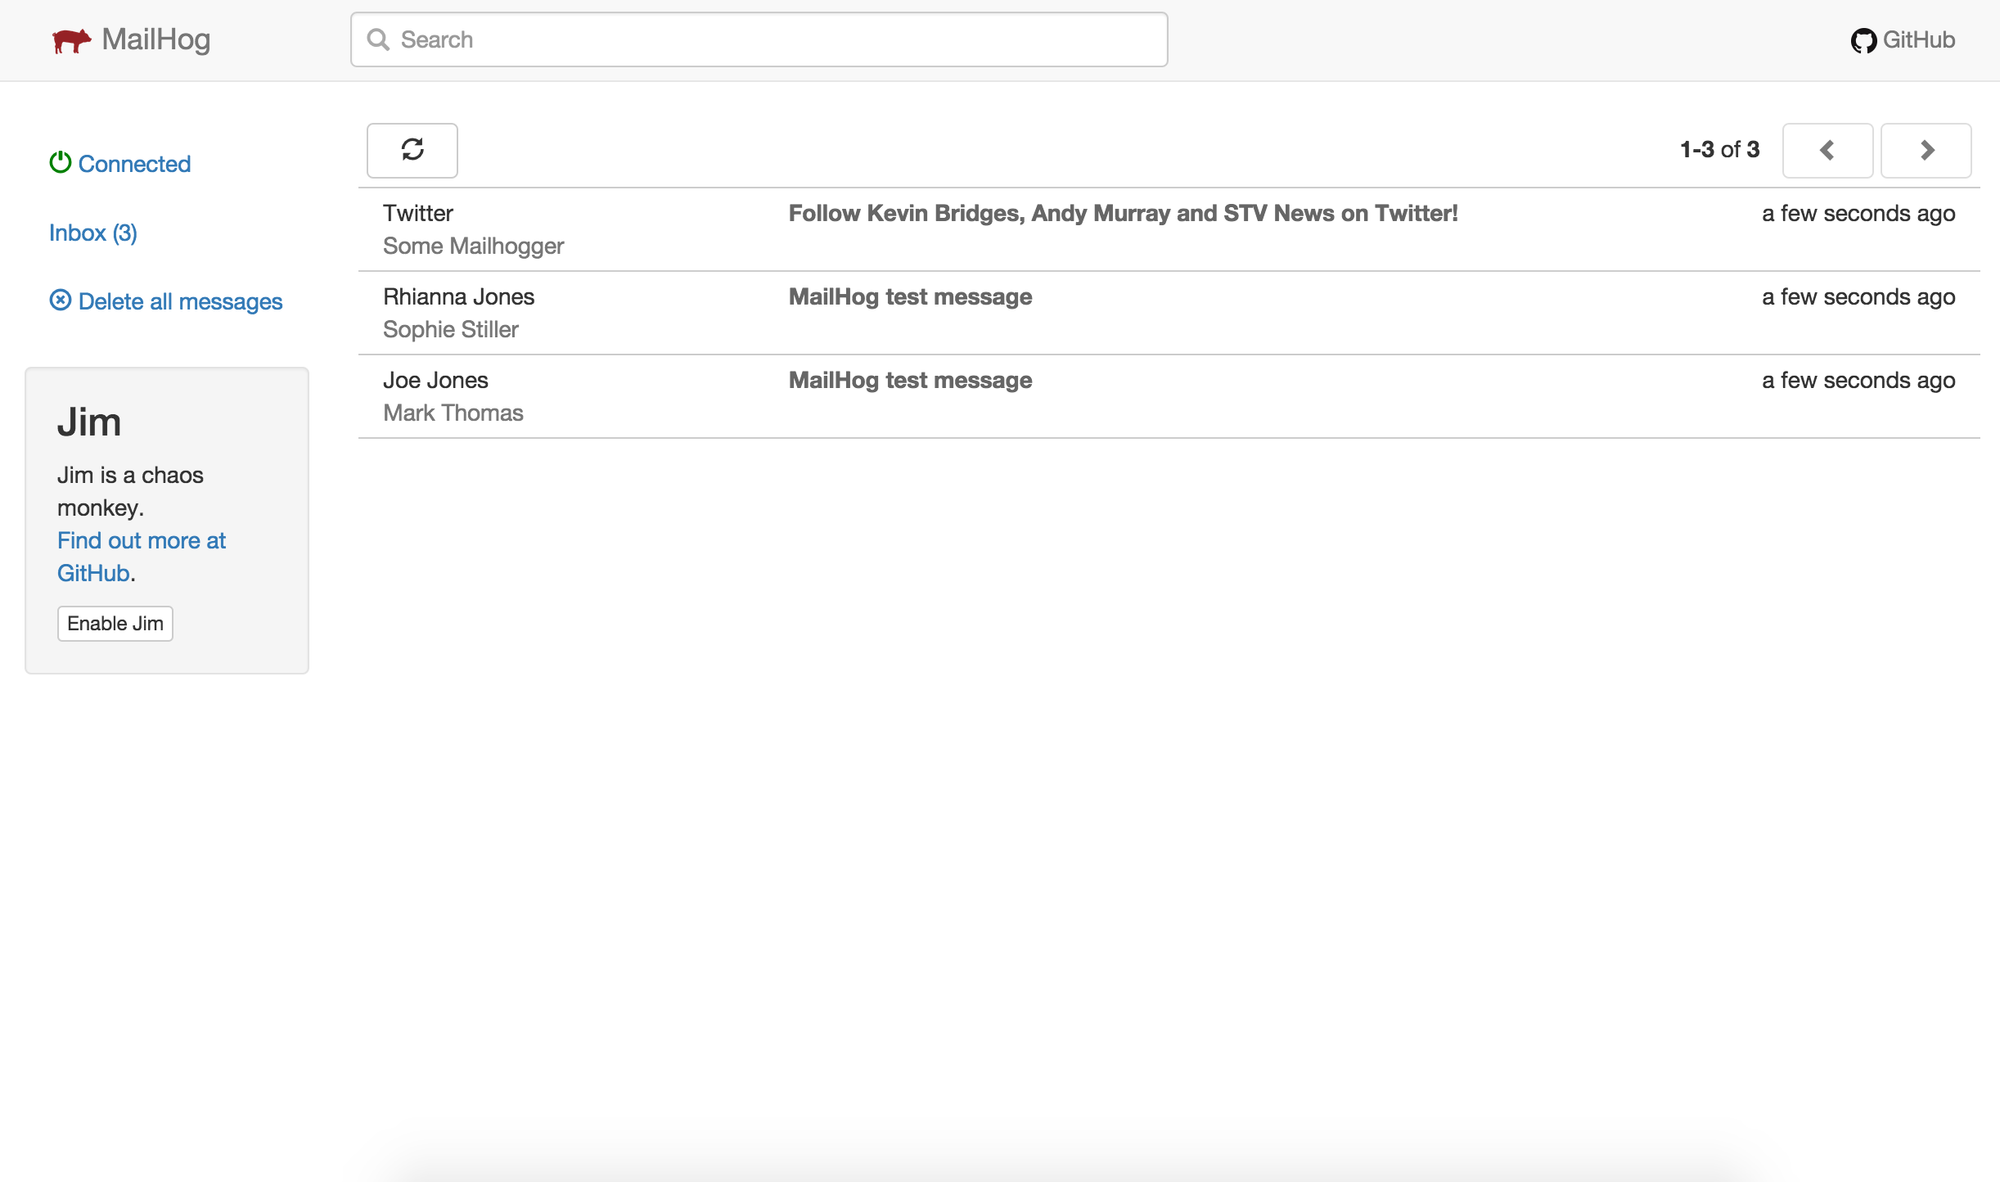
You can now open your browser and head to https://mailhog.<YOUR_DOMAIN> and you’ll get a web interface for mailhog. It’s now basically ready to use. In here you’ll see any emails you send to the server no matter of the recipient. You can even configure the system to release email to a real SMTP server.
You’ll need to configure your SMTP details in the application you’re testing to point to the following settings:
SMTP SERVER: mailhog.<YOUR_DOMAIN>
SMTP PORT: 1025
More Features!
The example above uses a basic setup and saves messages in memory, so if you restart the container you’ll clear the mail queue, however you can configure the server to save messages in mongoDB or even configure file storage for them.
Other notable features include:
- Releasing mail to real smtp servers
- Basic Auth for the web GUI
- Multipart MIME support
- Download individual MIME parts
- JIM - a chaos monkey service for testing failure of smtp servers on your app
Conclusion
Mailhog is basic by design but this is a good thing when you’re testing out software and you need to make sure mail functionality is working. I’ve managed to catch a few bugs this way myself and recommend it to anyone needing to do this type of development work. Whether it’s for testing a custom app, Forgejo Git server, or Wordpress running internally, it’s extremely useful.
I’d love to see some new features on here, but the project is pretty stable so don’t worry too much about the code being old.
Pro’s
- Super lightweight (doesn’t use many resources)
- Great for debugging and testing apps
- Really simple to set up
Con’s
- Old code base, could maybe use some love
- Only uses basic auth on web interface
- No extensions, but in all honesty you don’t really need it
PiSource Score
| Easy of Setup | Features | Ease of Use | Extendability | Total |
|---|---|---|---|---|
| 10 | 9 | 7 | 0 | 26/40 |