Install a Minecraft Server on Raspberry Pi (Java Edition)
One thing that’s great fun to do with a Raspberry Pi is to play Minecraft, and you can use the tiny single board computer to run a server where you and others can play. We’ll look at setting up Minecraft Server Java Edition on the Pi.

One thing that’s great fun to do with a Raspberry Pi is to play Minecraft, and you can also use the tiny single board computer to run a server where you and others can play with each other, be it co-operative or competitive. In this post we’ll see how easy it is to set up your own server, and when I say easy, I mean really easy.
Requirements
- Raspberry Pi (recommended 4 or above)
- Docker installed (just follow the guide)
Setup
To start with we are going to run the vanilla version of Minecraft Java and by that I mean the one that Mojang ship; there are other versions with different mods etc., and this docker image we are going to run supports them (you just need to tweak a few lines), but for now we’ll keep it simple.
Let’s start by setting up the directories we need to persist the data so that when you restart the Pi or the container, your world stays intact.
sudo mkdir -p /opt/containers/minecraft/dataYep, that’s it! That sets up all the directories you need - I told you this was going to be super simple!
Next we need to create a compose.yml file in the /opt/containers/minecraft directory. I use vi but you can use nano or your favourite editor.
sudo vi /opt/containers/minecraft/compose.ymlCopy the text from below and paste it into the new file.
i key to go into insert mode then you can paste the contents inservices:
mc:
image: itzg/minecraft-server
ports:
- 25565:25565
environment:
EULA: "TRUE"
tty: true
stdin_open: true
volumes:
- /opt/containers/minecraft/data:/dataNow save and close that file.
esc then type :wq to write and quitRunning the server
You’re now ready to run your own Minecraft server with the following commands.
cd /opt/containers/minecraft
sudo docker compose up -d
Wait a few seconds and the server will start, if you take a look in the data directory now you’ll see a bunch of files. Some of these you can tweak such as server.properties which will allow you to change game settings - the two main ones to look for are difficulty which can be peaceful, easy, normal or hard and gamemode which can be survival, creative, adventure or spectator. If you do edit this file, you’ll need to first stop the server and then restart like so:
cd /opt/containers/minecraft
sudo docker compose down
sudo docker compose up -d
There is a bunch of other useful files in here as well, such as ops.json which lets players run commands from Minecraft. It’s also worth noting that this docker file lets you change some of these settings via environment variables you can include in the docker compose file. To check out all the options, head to https://docker-minecraft-server.readthedocs.io/en/latest/variables/
Finally, you can also use the environment variables to set the server version and type which allows you to play versions of Minecraft with mods.
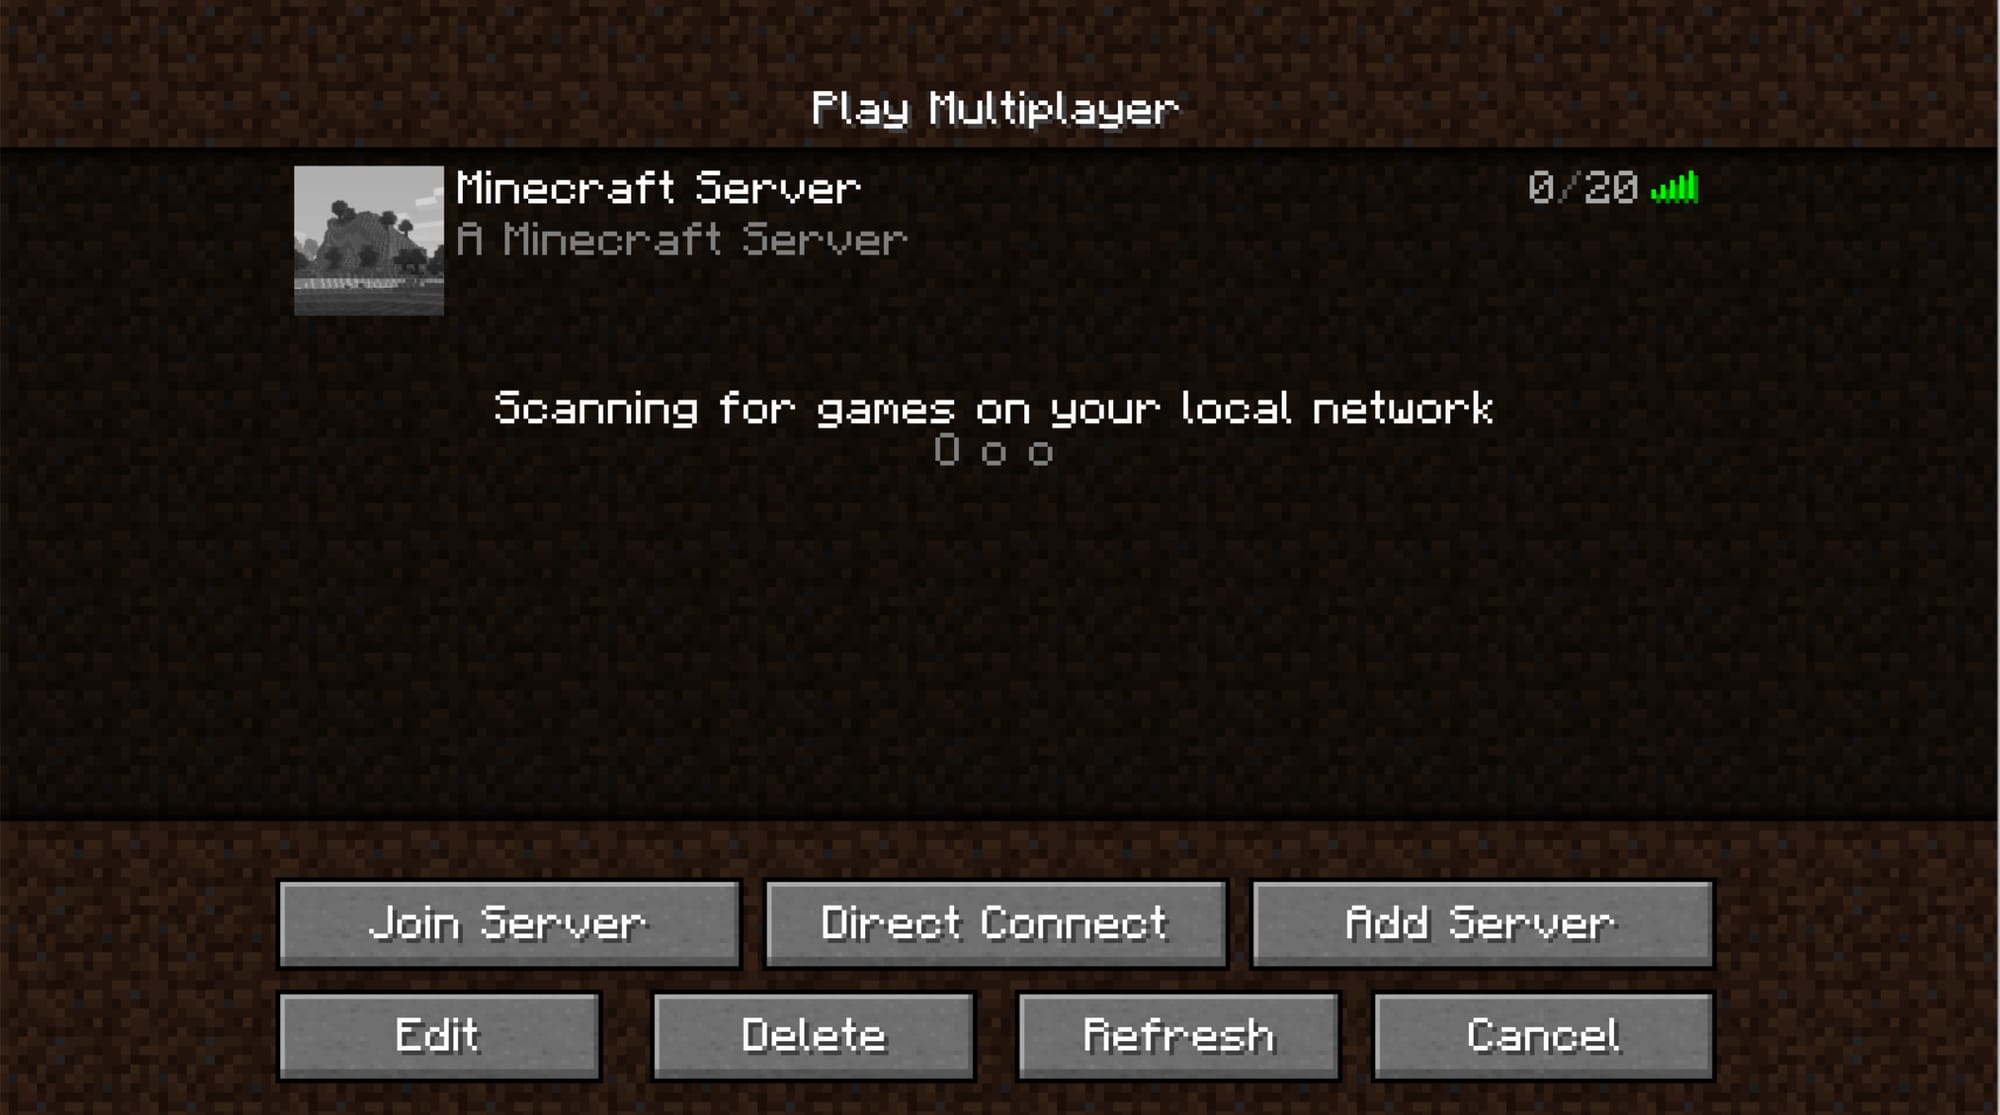
Connecting
All that’s left to do is connect and play! Open Minecraft on your desktop, go to the multiplayer settings, and you should be able to see the server on your network. If it doesn’t appear, add it by clicking Add Server and then enter the IP address or hostname of your Pi. That’s it, nice and simple - just a couple of directories and a docker compose file and you’re up and running - no need to setup and install Java and change system settings - it just works.
Conclusion
It’s super simple to set up and it really takes the game to a new level being able to play with others. I highly recommend setting this up, it’s something we do here in the family home and thoroughly enjoy. This docker image is excellently put together and offers many settings, big up to itzg for building this. Go get it setup!
Pro’s
- Super easy to setup
- Easy to load mods and versions
- Great fun!
Con’s
- You can lose a lot of time playing this
PiSource Score
| Easy of Setup | Features | Ease of Use | Extendability | Total |
|---|---|---|---|---|
| 10 | 10 | 10 | 10 | 40/40 |