Inside out, open your homelab to the web
Securely expose your Raspberry Pi to the internet, making your homely hosted service available to everyone.

Sometimes you want to open up a service you're running on your home lab to the internet, but here is where you face some tough choices. You may not have a static IP associated with your connection, so you could use a dynamic DNS service to solve this, but then there's the issue of opening up your firewall on your router. Let's say you want to allow port 80 and 443 to your Pi for running a web server, that's simple enough to do with port forwarding but your Pi is going to get ALL traffic sent at it on those ports, so if someone decides to flood your connection with traffic, you have to deal with it.
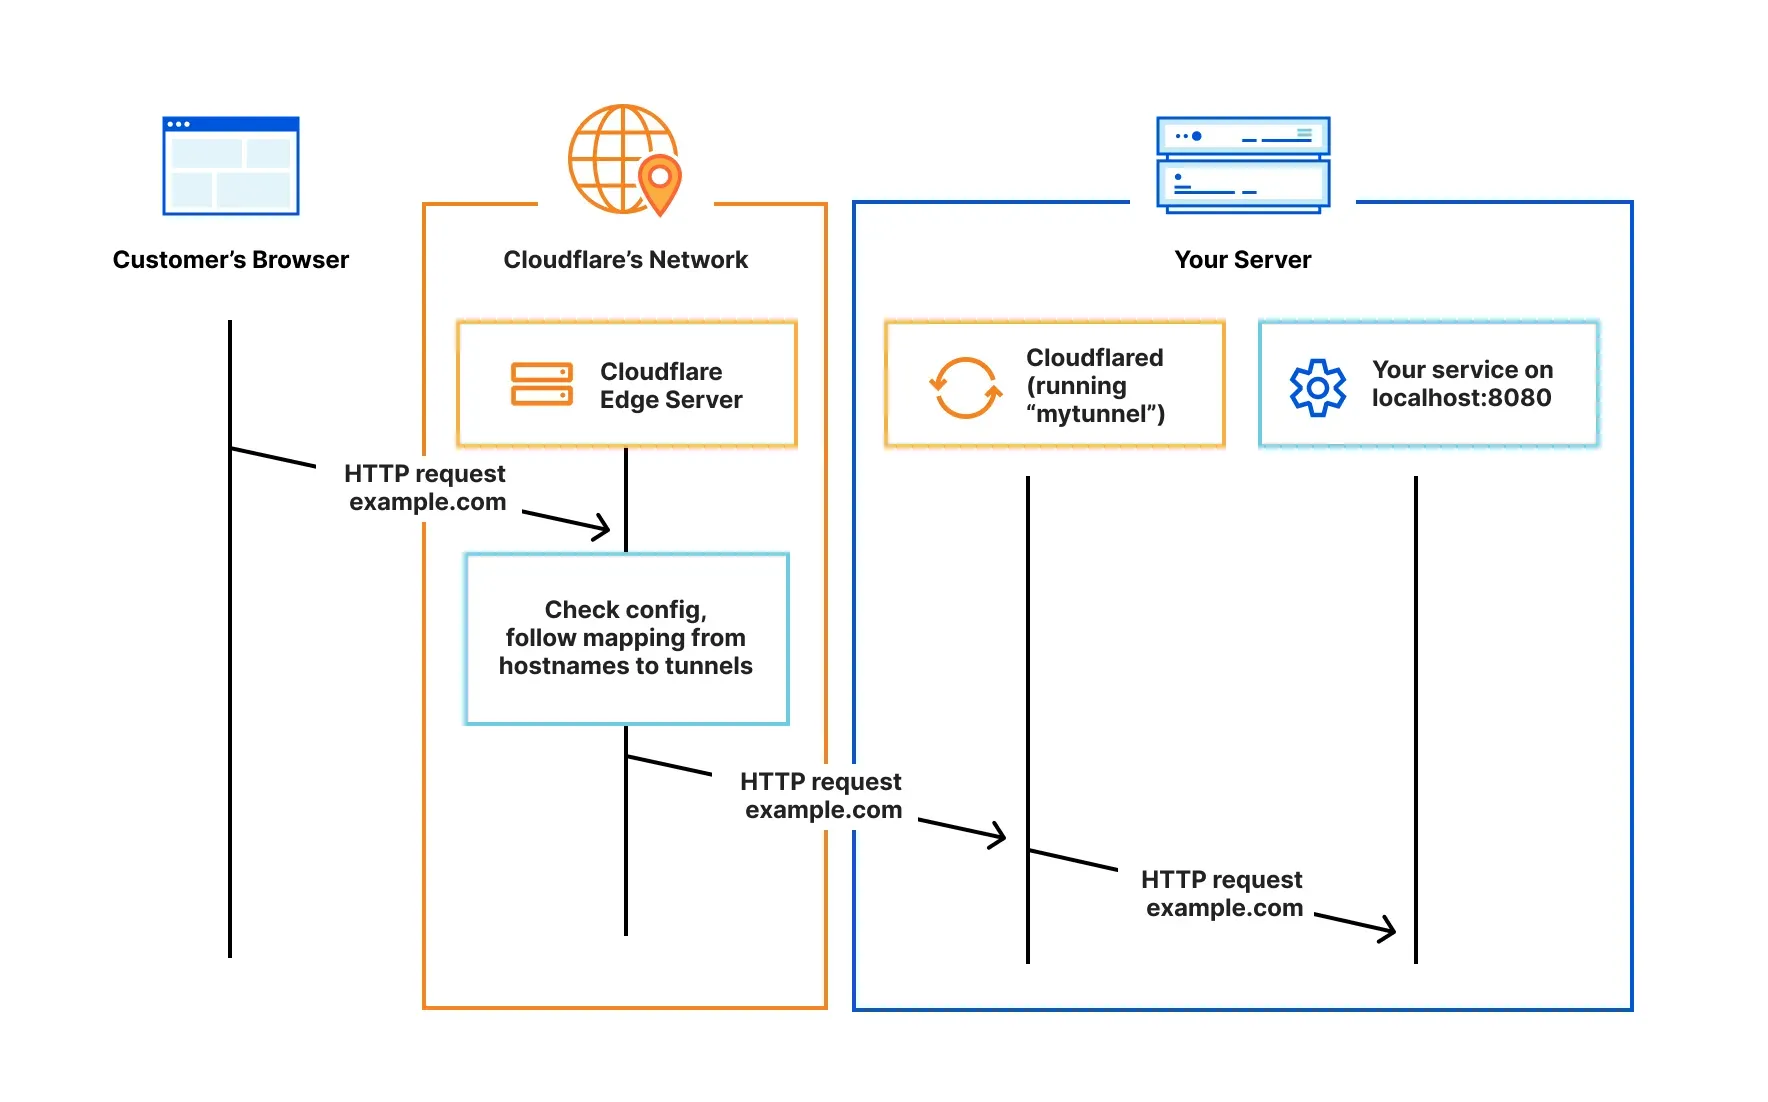
In this article we are going to look at an alternative, a Cloudflare ZeroTrust Tunnel! This basically sets up a VPN from your Pi to the Cloudflare network, and this is where you point your DNS, a constant reliable endpoint. You then tell Cloudflare which domains/URLs you want to allow down the tunnel to you Pi and it forwards only relevant traffic. You'll get protection from several issues that would affect you if you were to go direct to your router, such as:
- DDoS Protection: Stops someone trying to flood your connection with traffic
- Free SSL: Cloudflare will set up SSL for your traffic
- DNS Integration: This is super easy especially if you use Cloudflare as your DNS provider
- Firewall: You can choose which ports and protocols are sent down the tunnel
The great news is that running a tunnel for a small setup is free for up to 50 users, so more than enough capacity for a small setup, which is all you can host on a Pi anyway.
If you want to visualise how this connection will work check out the diagram below!
Setup
For this we are going to extend our setup of the traefik proxy which allows us to make connections to multiple services on the same Pi and I'll talk about how you can use it to open your Ghost Blog up to the world, but this would work for any service you run behind your traefik setup.
Requirements
You'll need to make sure you follow the guides below to get the basics setup.
- Docker installed on your Pi
- Traefik installed and configured
- A Cloudflare account
- A DNS zoen hosted on Cloudflare
Creating a token in Cloudflare
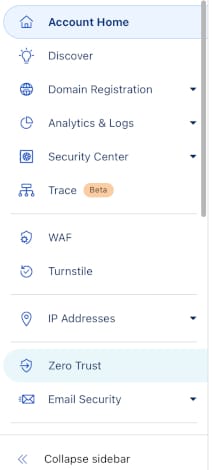
Once your Pi is prepared and ready you'll need to open your browser and head to https://cloudflare.com to setup an account. After you've created your account and logged in on Cloudflare you'll need to navigate to the ZeroTrust section that's in the menu on the right hand side of the page:
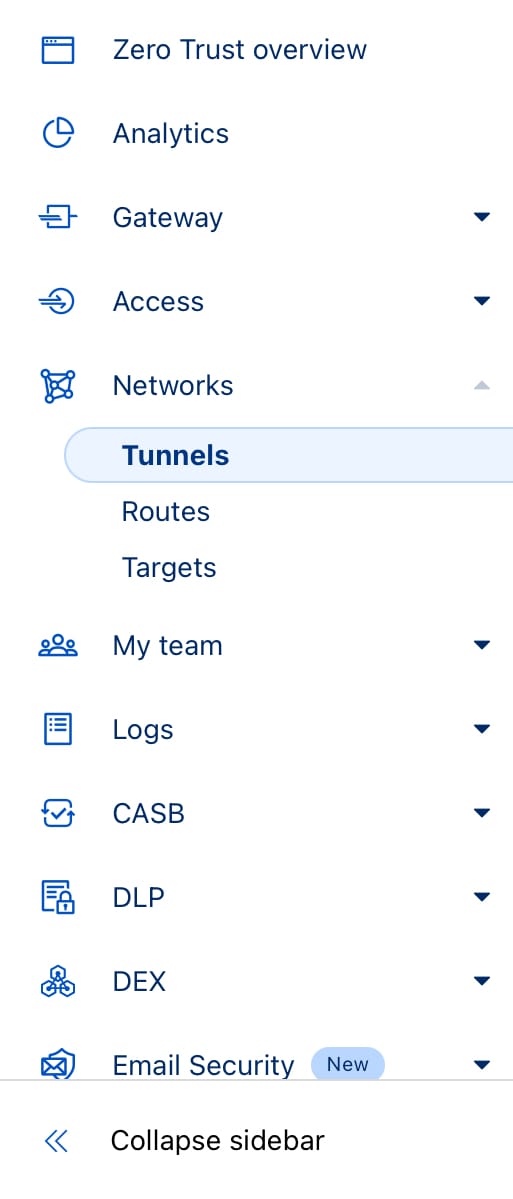
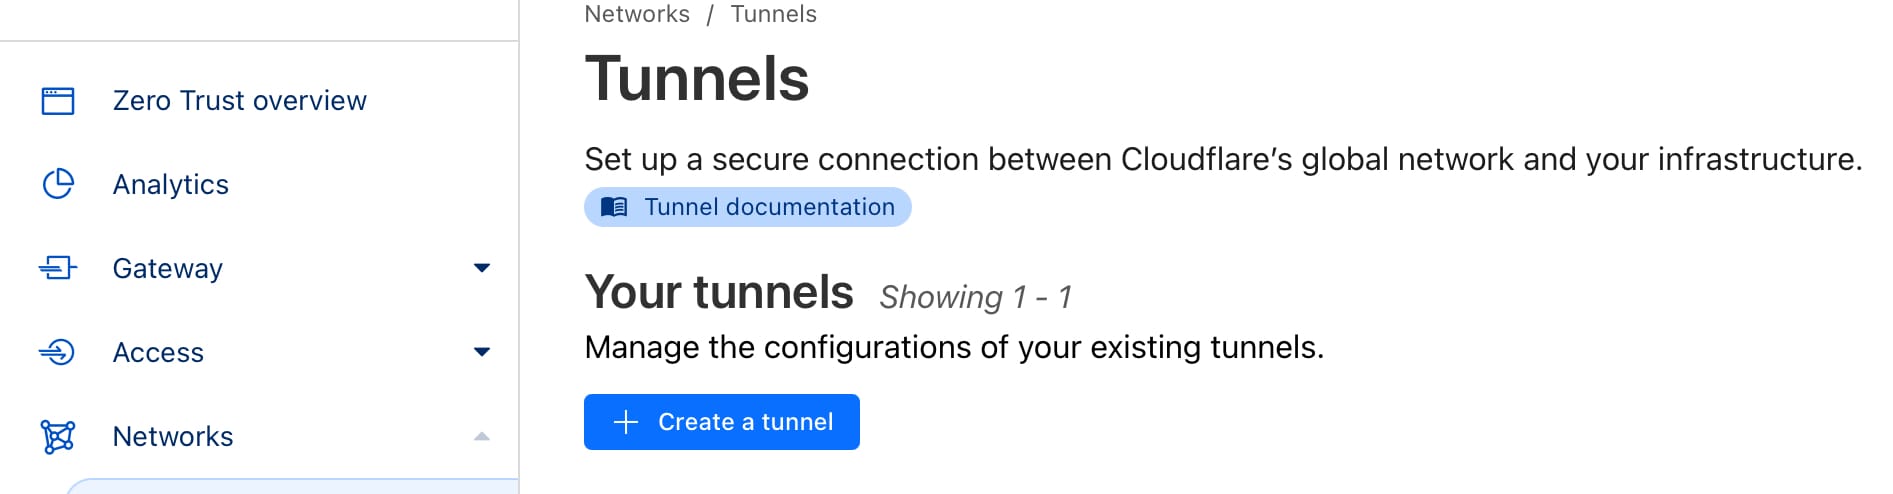
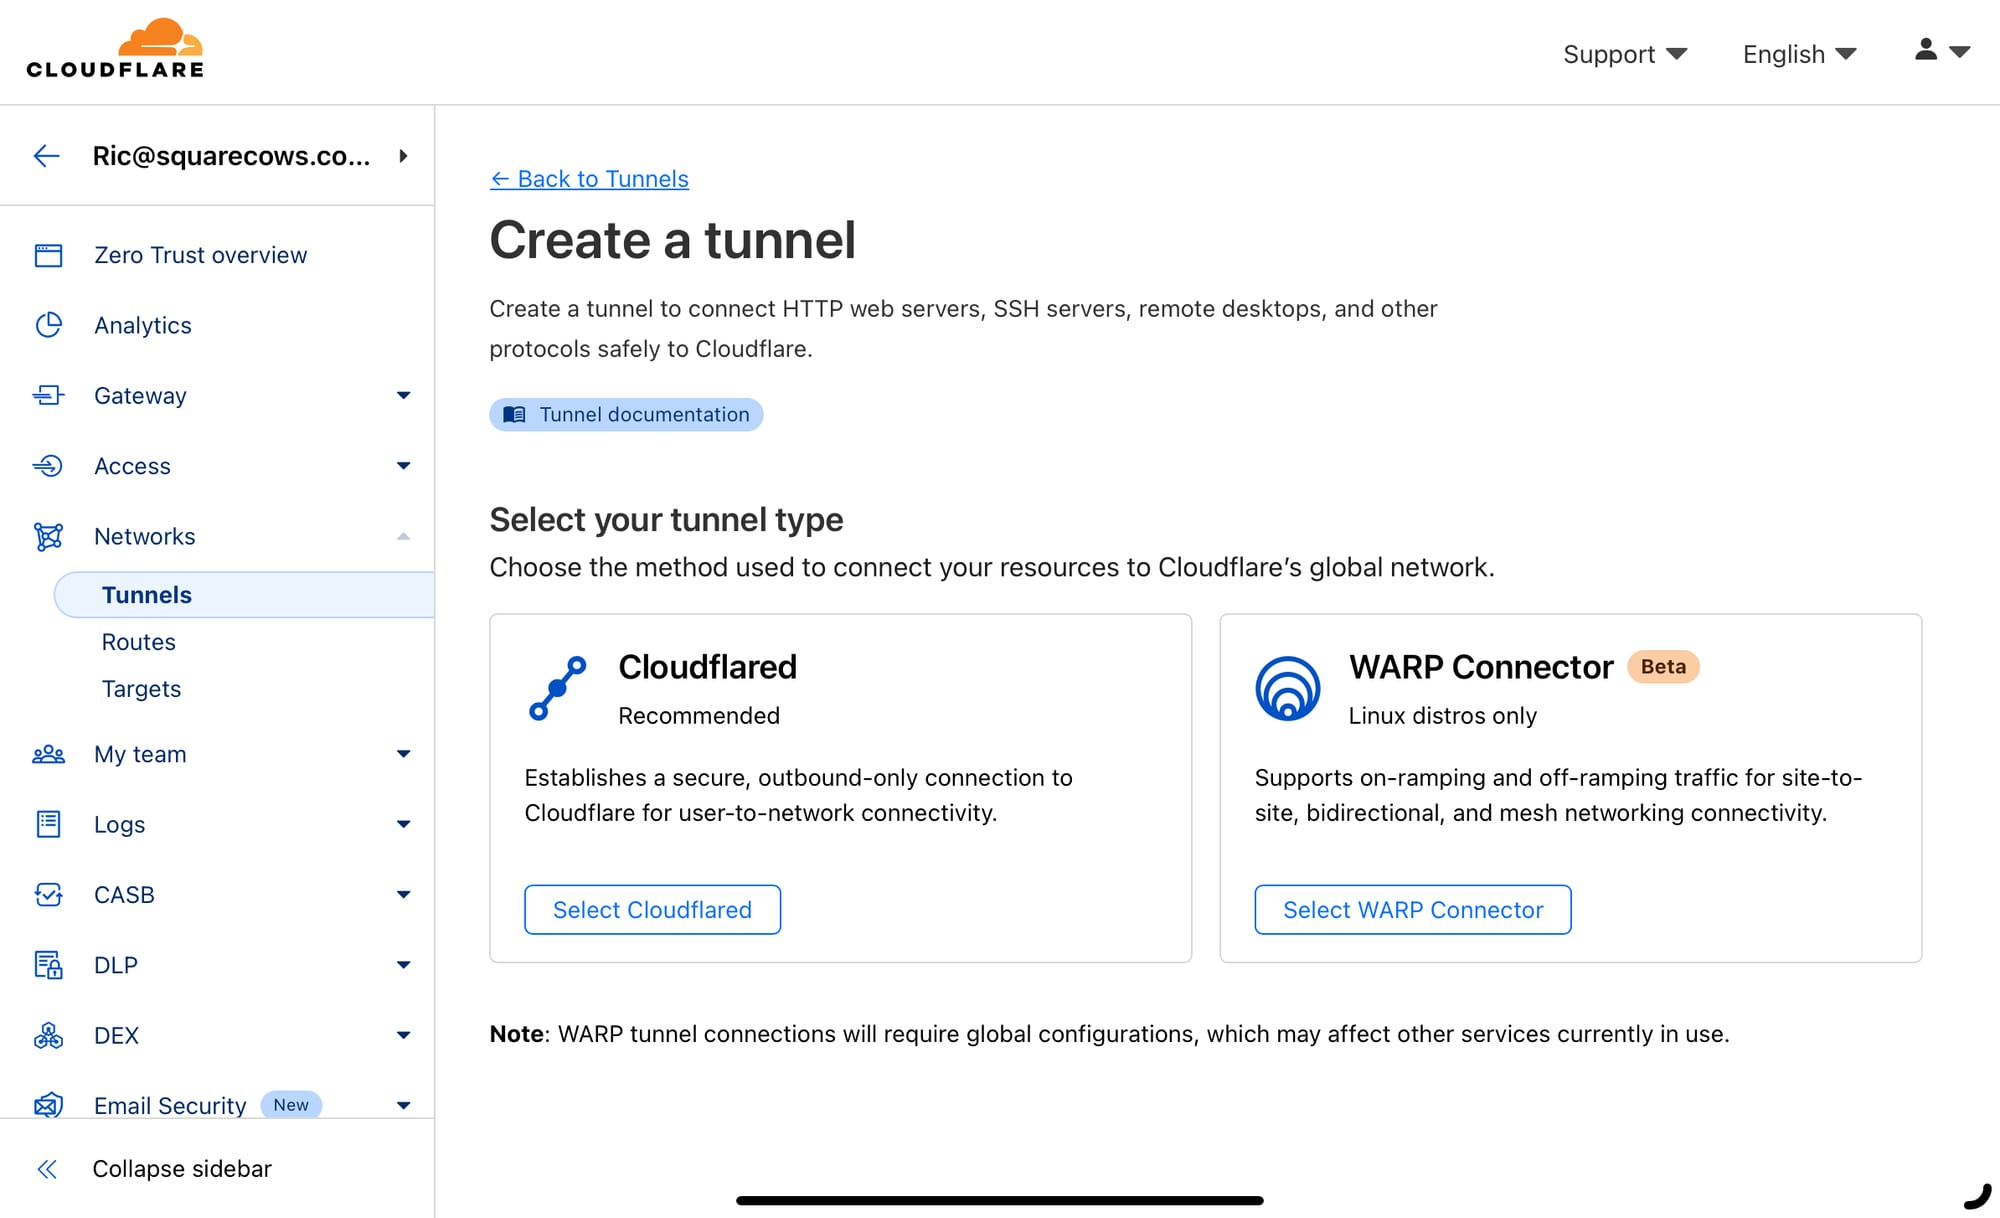
Now that you are in the ZeroTrust console in the website browse to Networks and expand the section, and select Tunnels. From here you'll be able to create a new tunnel where you'll want to choose the type Cloudflared - this stands for Cloudflare Deamon (the process that will run on your PI).
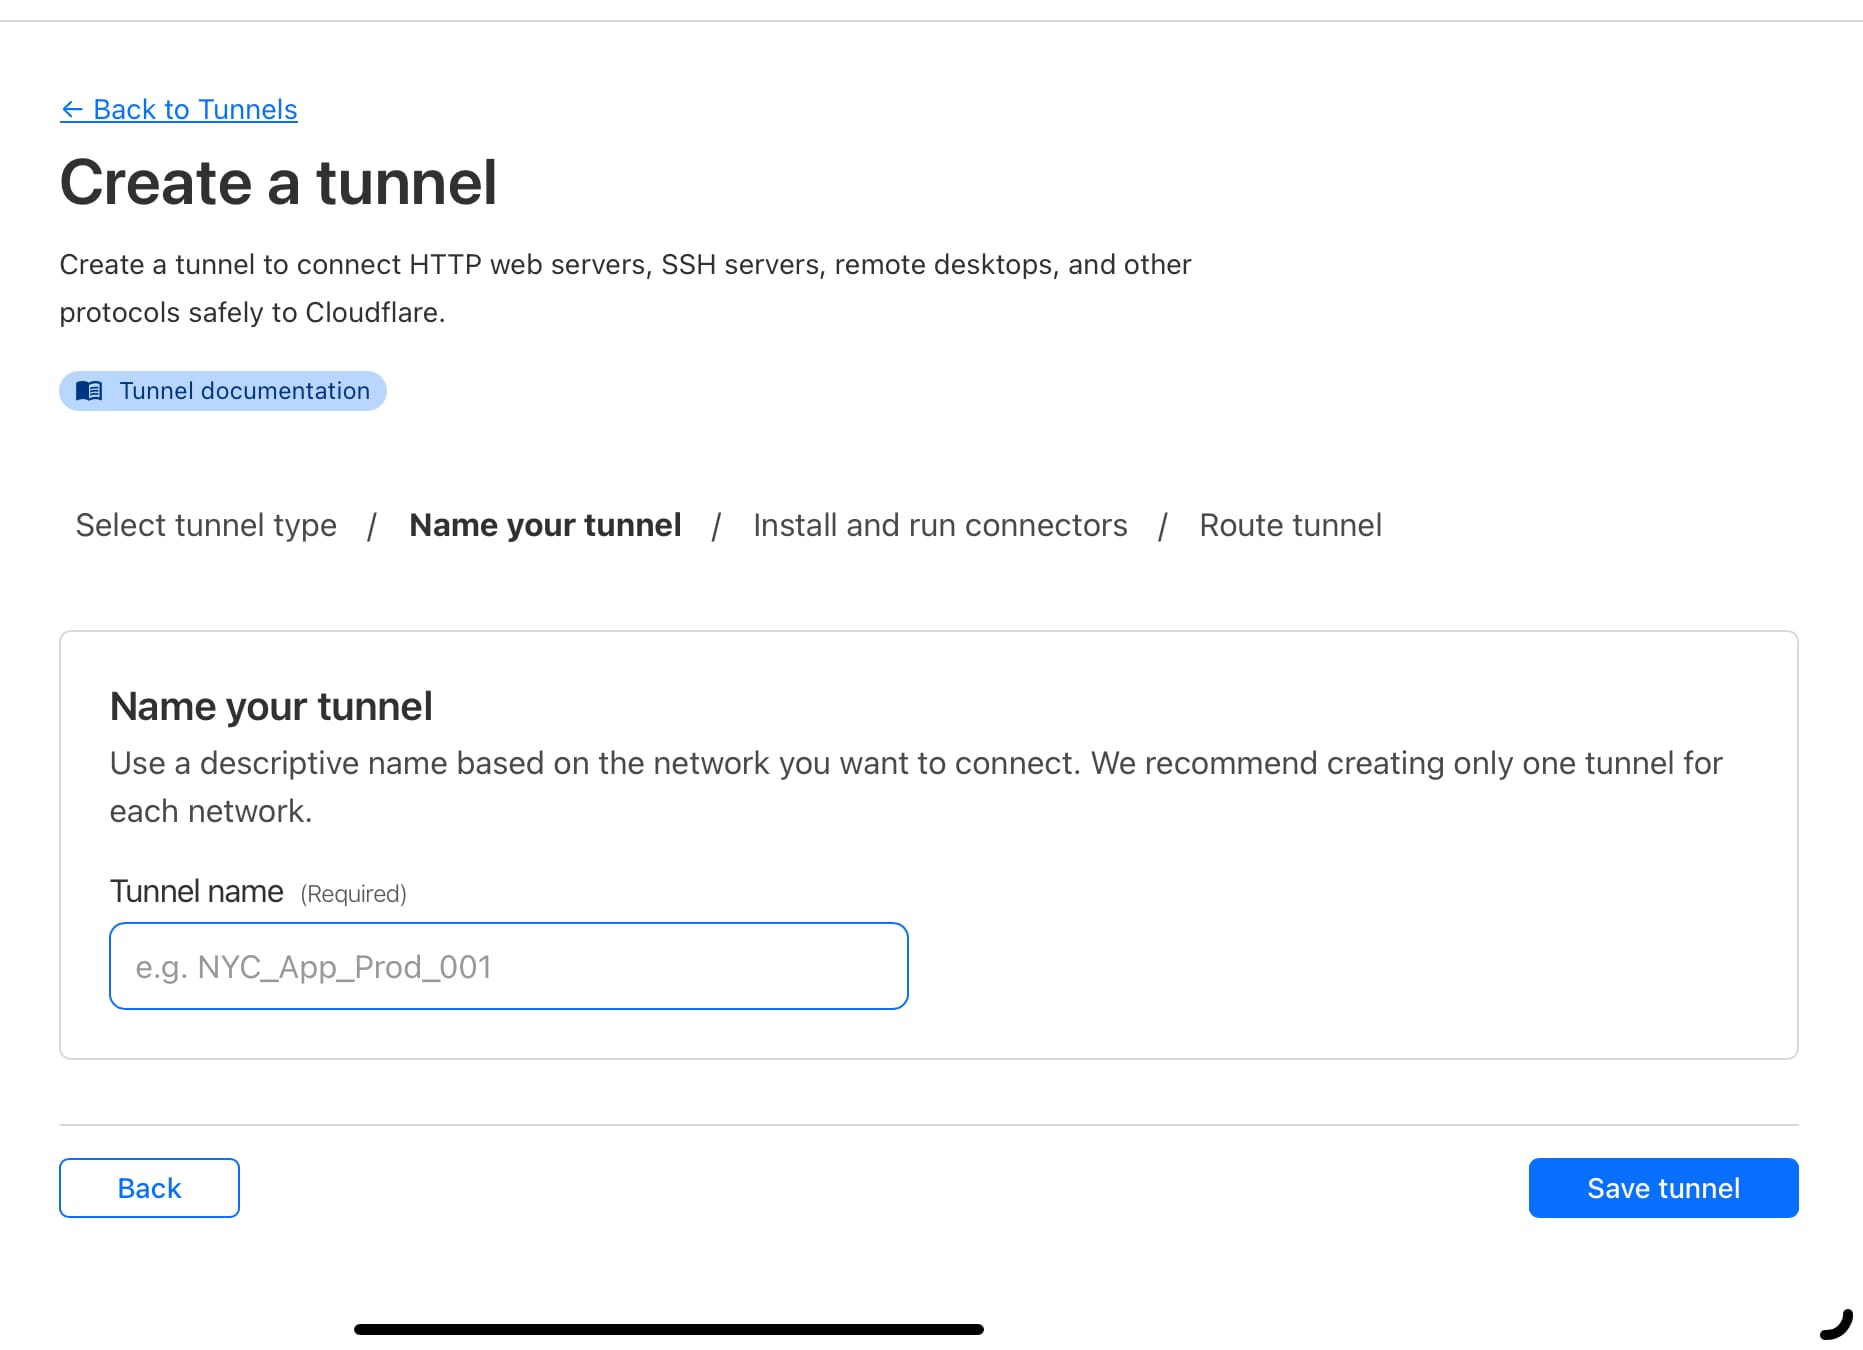
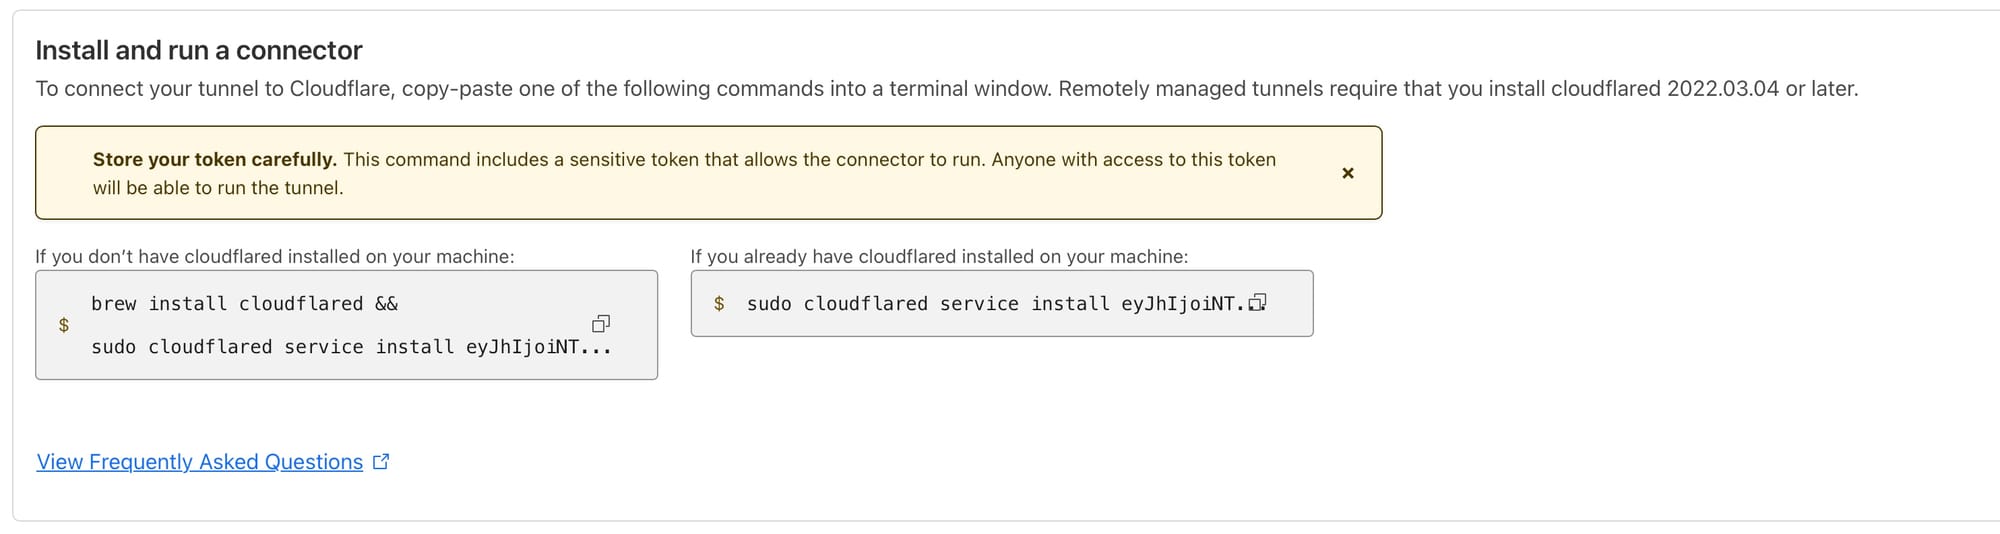
The next bit is pretty simple, you just need to name your tunnel and then you'll be presented with a screen asking you to Install and run a connector. We aren't going to follow those instructions but you will need the key from the instructions so where it says something like "sudo cloudflared service install eyJhBIG_LONG_KEY" copy that info and keep it saved somewhere as you'll need it later.
Modifying traefiks compose file
Right now it's time to get the business end of this working, lets SSH into your Raspberry Pi Server and modify the compose.yml file you have for your traefik container. This will be located at "/opt/containers/traefik/compose.yml".
Before the networks section add the following but be sure to replace <YOUR_TOKEN> with the last part of the line you copied and saved from Cloudflare. In my example the last part was eyJhBIG_LONG_KEY.
  tunnel:
    container_name: cloudflared-tunnel
    image: cloudflare/cloudflared:latest
    command: tunnel run
    environment:
      - TUNNEL_TOKEN=<YOUR_TOKEN>
    networks:
      - cftunnel-transport
      - proxy
Now we need to modify the networks section. You'll need to add in cftunnel-transport: Like so:
networks:
  cftunnel-transport:
  proxy:
    attachable: true
Now save your file and we'll restart traefik.
cd /opt/containers/traefik
docker compose down
docker compose up -d
Give it a few seconds to pull the image and restart, then if you check the status of the tunnel in the Cloudflare website it should report as HEALTHY.
Forward traffic to traefik
Now all we have left to do is actually route the website you want to your Pi. First of all spin up a service such as the ghost blog, but instead of setting the variables as an internal DNS name, set it to something you can use as a public host name, such as blog.pisource.org (of course use your domain equivalent).
Now log back into the Cloudflare console and click the three little dot's ⠇at the end of the line (which shows your tunnel is healthy) and select configure. You'll be presented with a screen showing the settings of your tunnel, but you need to click on Public Hostname in the menu at the top of the config section.

From this page you can click the + Add a public hostname button:

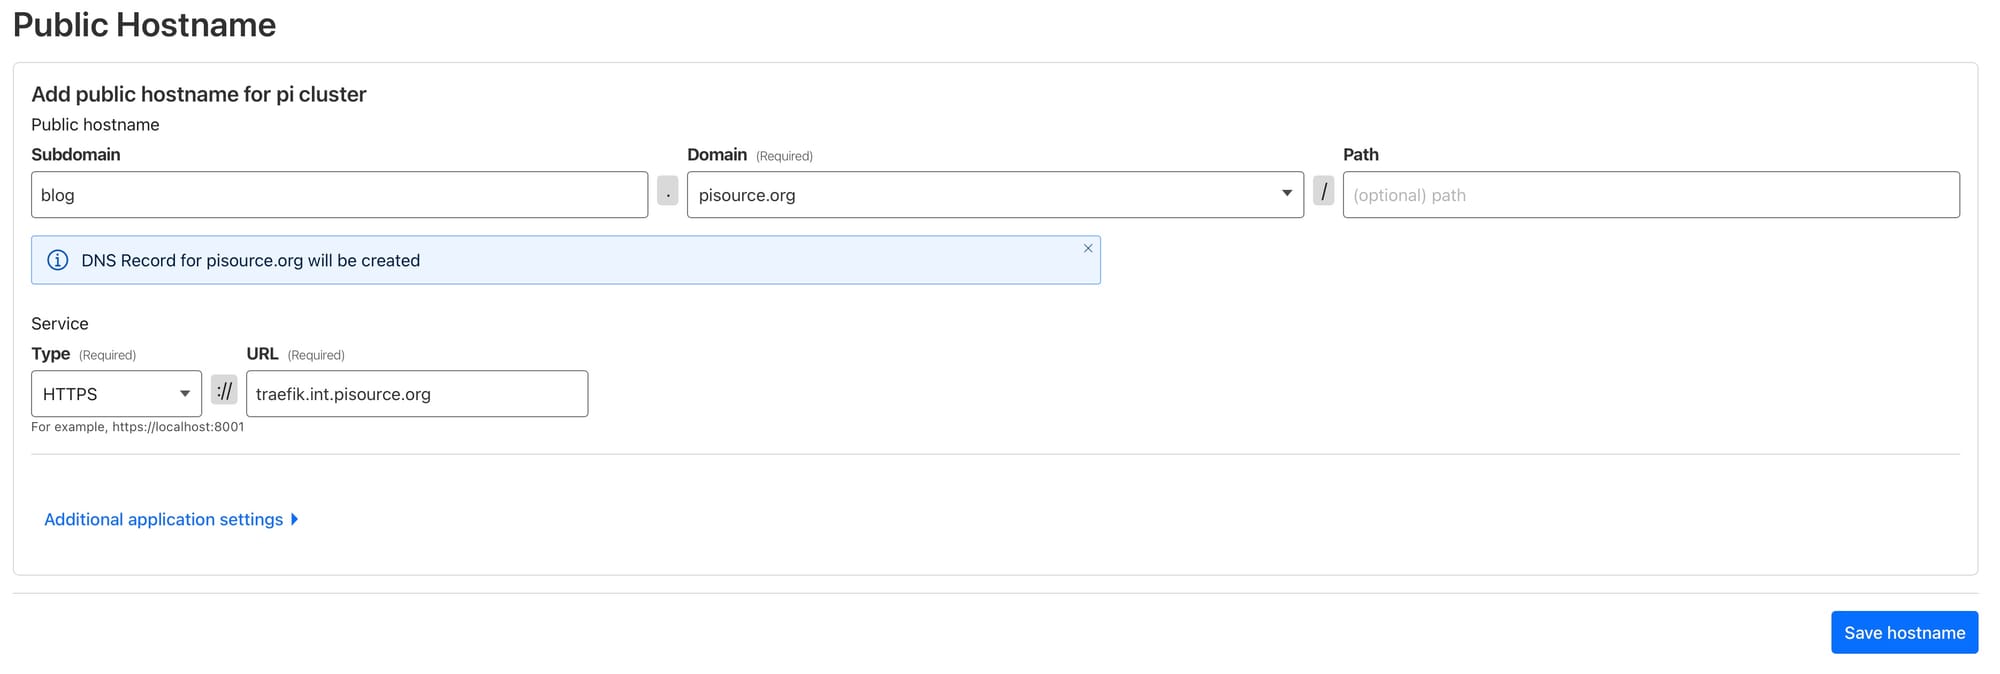
Now it's time to configure your website to forward down the tunnel. In the example screenshot below I've configured blog.pisource.org to forward down the tunnel; its destination is HTTPS and the URL is traefik.int.pisource.org which is the endpoint I set up on my internal DNS when I first installed traefik, so you should adjust this to match your environment. Cloudflare will automatically setup the DNS entry for the public host in the DNS zone you are hosting on Cloudflare and it will secure this with SSL, so you don't need to do anything special here.
You'll be relieved to hear that's it! You've completed the setup, all that's left to do now is head to your browser and type in your external DNS (https://blog.pisource.org in my case) and traffic will start flowing down the tunnel and to your Pi, and this is now available to anyone on the internet so you can broadcast yourself to the world!
Now go grab a cup of coffee and relax - you deserve it!

Conclusion
This setup requires some quite advanced topics to understand in terms of networking, but I've tried to keep it as simple as possible to make it more accessible to those beginning their homelab adventures. You can do lots of advanced things here such as IP blocking, adding authentication, network routing for more services, etc. but to get the basics working you won't need to do this. It's definitely a more secure way of opening services up to the world and offers you protection against your internet connection being flooded and becoming unusable. The other great news is that the service is free, so the question is why wouldn't you use this?
Pro's
- more secure than opening up your router ports
- built in advanced routing
- automatically configures endpoint SSL certs
Con's
- requires you to host your DNS in Cloudflare (may be possible without but untested)
- If your site gets really popular, consider your bandwidth and computing resources, is it fast enough and is the Pi going to cope?
PiSource Score
| Easy of Setup | Features | Ease of Use | Extendability | Total |
|---|---|---|---|---|
| 6 | 9 | 7 | 10 | 32/40 |