Holy moly, remote (Gu)access-amole!
Setting up Remote Desktop and SSH connections with a Raspberry Pi to resources in your network can be secure and private with Apache Guacamole.

Sorry about that.
So, whether you have 1, 2 or an entire rack full of Pi like me, at some point you might have thought “how do I get remote access to these whilst I’m away from home?” Thankfully there are lots of options, from VNC, SSH and the new Raspberry Pi Connection Service. The latter is probably the most modern approach for GUI and SSH access. As for VNC, for many years now I’ve been nervous about the thought of opening it up to the internet from my router as it has had a bunch of security issues in the past, so I’ve steered away from that solution. You’ll also find that if you have more than one Pi and you want to get remote access to them with VNC and/or SSH, you are limited by your router and your ISP IP address policy to how many you can port forward, unless you use different TCP ports which gets hard to remember, or you do some fancy port forwarding.
The Raspberry Pi Connect Software solves this issue as you don’t need to open any ports; your Pi communicates outwards to the service with software you install on the Pi. In the Pi Connect interface you then get the option to connect via SSH or Remote Desktop in your browser. There is an element of trust here though; you’ll need to trust Raspberry Pi (the company) to keep the software secure and fend off hackers, and if they do, that leads us to the question: is it going to remain free? Currently, the software is in beta and there is no charge.
This is where Open Source steps forward once again to offer another solution, one you’re in control of and one that’s completely private to you and will always be free. That tool is called Apache Guacamole!
Apache Guacamole!
So what is Apache Guacamole and what can it do?
It’s a web application that allows you to access SSH, Telnet (please stop using this), VNC and RDP connections via your web browser. If the server you are connecting to can connect to other resources in your network, it can also give you access to those machines by proxy. For example, if you have a Windows machine, your Pi could act as a web interface to its RDP session and you could access that anywhere on the internet, or you could use it to SSH/VNC directly onto your Pi or others on your network, depending on if you wanted the command line or desktop experience.
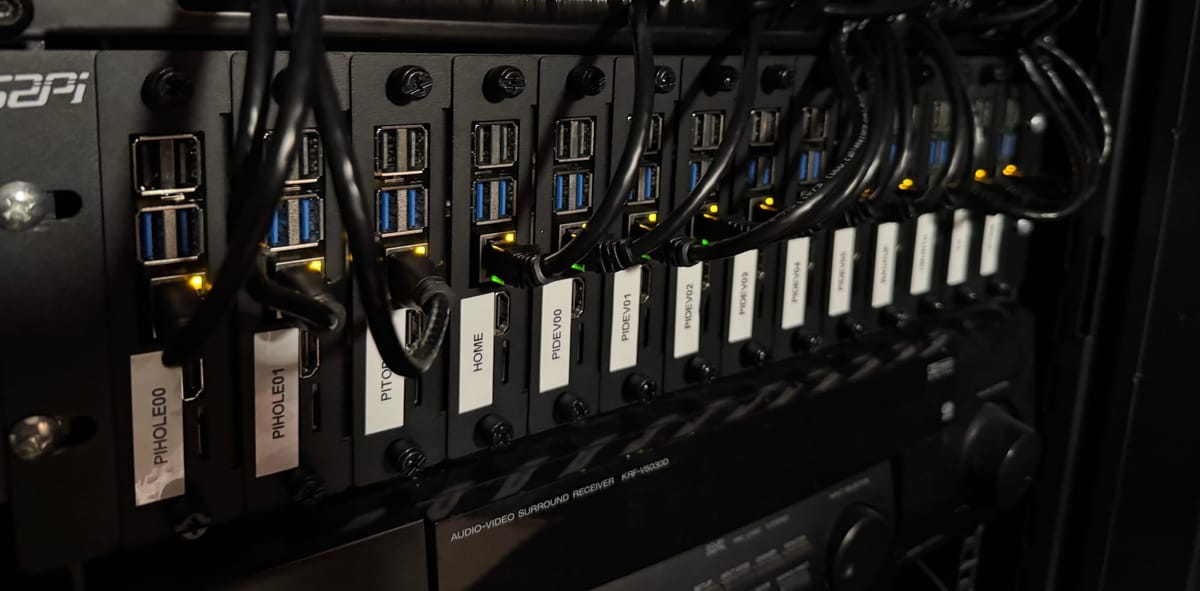
A little about my setup
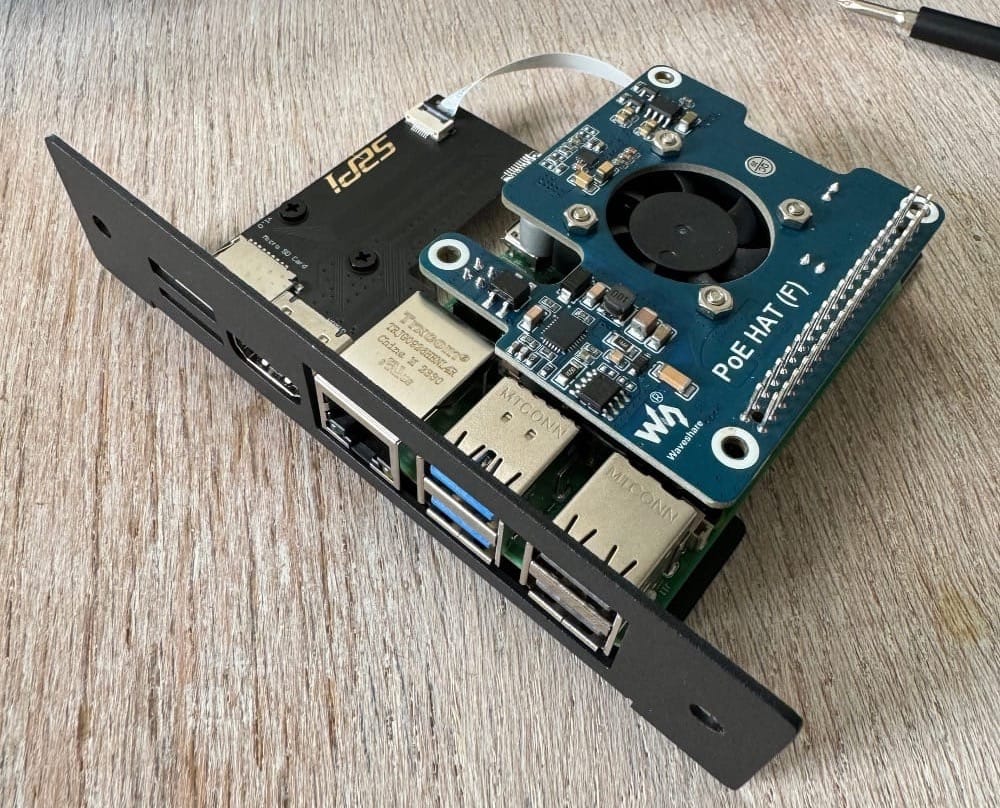
I host a lot of Raspberry Pi, they all have slightly different jobs. Some are CI/CD runners for my automated build processes; I have a docker swarm cluster running, development Pi, TVHeadend, a Remote Desktop Pi to access whilst I’m away, PiHole, home assistant and various others. I brought a 19” rack mount from 52Pi (newer version here) that was designed for the Pi 4. It’s now full of Pi 5’s and the only thing that doesn’t really work/fit is the SD card adaptor which makes the micro SD card accessible at the front - I’m pretty sure it just doesn’t push in far enough. But most of these now have a wave share PoE + M.2 hat with SSDs installed now so it’s not too much of an issue for me. I’d highly recommend that if anyone is going to rack mount Pi, they should consider PoE HATs to make the cabling a lot neater.
Requirements
- Raspberry Pi running docker
- Traefik setup as a reverse proxy
- The ability to port forward from your router (port 80 and 443 recommended)
- Static IP on your ISP or a Dynamic DNS service
Getting running in docker
I spent a lot of time getting this working to save you a headache (you can thank me later). I had loads of issues and contradicting advice on how to get this working but I finally got there. It’s something I’ve been meaning to get running for a long time but writing this blog post finally pushed me to get on with it! I have to say it wasn’t trivial but I’ve managed to get it down to a really easy install for you!
Go ahead and SSH into your Pi Server and then run the following commands. You can choose to use your favourite editor instead of vim if you wish.
sudo mkdir -p /opt/containers/guacamole/db-data
cd /opt/containers/guacamole
sudo vi compose.yml
Now you can copy and paste the following into your new file. Remember to change the value of <YOUR_DNS> to match your DNS. You may want to make this an internal entry or, if you are opening it up to the internet, you’ll want something resolvable outside your network with a FQDN (fully qualified domain name).
services:
  guacdb:
    container_name: guacamoledb
    image: mariadb:10.9.5
    restart: unless-stopped
    env_file:
      - .env
    networks:
      - guacamole
    volumes:
      - './db-data:/var/lib/mysql'
  guacd:
    container_name: guacd
    image: richarvey/guacamole-server:latest
    restart: unless-stopped
    networks:
      - guacamole
  guacamole:
    container_name: guacamole
    image: richarvey/guacamole-client:latest
    restart: unless-stopped
    env_file:
      - .env
    labels:
      - traefik.enable=true
      - traefik.http.routers.guacamole.entrypoints=web
      - traefik.http.routers.guacamole.rule=Host(`guacamole.<YOUR_DNS>`)
      - traefik.http.middlewares.guacamole-https-redirect.redirectscheme.scheme=https
      - traefik.http.routers.guacamole.middlewares=guacamole-https-redirect
      - traefik.http.routers.guacamole-secure.entrypoints=websecure
      - traefik.http.routers.guacamole-secure.rule=Host(`guacamole.<YOUR_DNS>`)
      - traefik.http.routers.guacamole-secure.tls=true
      - traefik.http.routers.guacamole-secure.tls.certresolver=myresolver
      - traefik.http.routers.guacamole-secure.service=guacamole
      - traefik.http.services.guacamole.loadbalancer.server.port=8080
      - traefik.docker.network=traefik_proxy
    networks:
      - guacamole
      - traefik_proxy
    depends_on:
      - guacdb
      - guacd


networks:
  traefik_proxy:
    external: true
  guacamole:
internal: trueescape :wqYou’ll now need to create the .env file and populate it with the example below, taking care to change your root and user MySQL password.
sudo vi .envGUACD_HOSTNAME: "guacd"
MYSQL_HOSTNAME: "guacdb"
MYSQL_ROOT_PASSWORD: '<SUPER_SECURE_PASSWORD>'
MYSQL_DATABASE: "guacamole_db"
MYSQL_USER: "guacamole_user"
MYSQL_PASSWORD: '<ANOTHER_SUPER_SECURE_PASSWORD>'
WEBAPP_CONTEXT: "ROOT"
Now when we run the next command it will only get us so far because the database isn’t setup, but go ahead and launch the stack.
docker compose up -dIf you tried to browse to the page now you’d get an error message from guacamole because we need to initialise the database. You’ll need to download the following file:
You can do this on your server by using wget.
We now need to push that database into the docker container. You’ll need to enter your root password here for this to work. If you’re wondering if there should be a space between -u and root and -p and your password, no, there shouldn’t be!
sudo docker exec -i guacamoledb mysql -uroot -p<YOUR_PASSWORD> guacamole_db <initdb.sqlOpening up your Router (optional)
If you want to access your systems from outside your network, for instance when you’re out and about, you’ll need to set up Port Forwarding on your router to forward TCP Port 80 and 443 to your Raspberry Pi. This varies from router to router so you’ll have to experiment to get this working and it’s beyond the scope of this article.
DNS
You’ll also need to point your DNS, either directly to the Pi’s IP / Traefik’s CNAME if you’re using an internal only setup or to your router’s public IP. Be warned: your public IP is likely to change so you’ll probably need to investigate a dynamic DNS service.
Logging in
Right then - time to login and get this working! Head to your DNS entry via your web browser. Mine is:
https://guacamole.internal.pisource.org
for example.
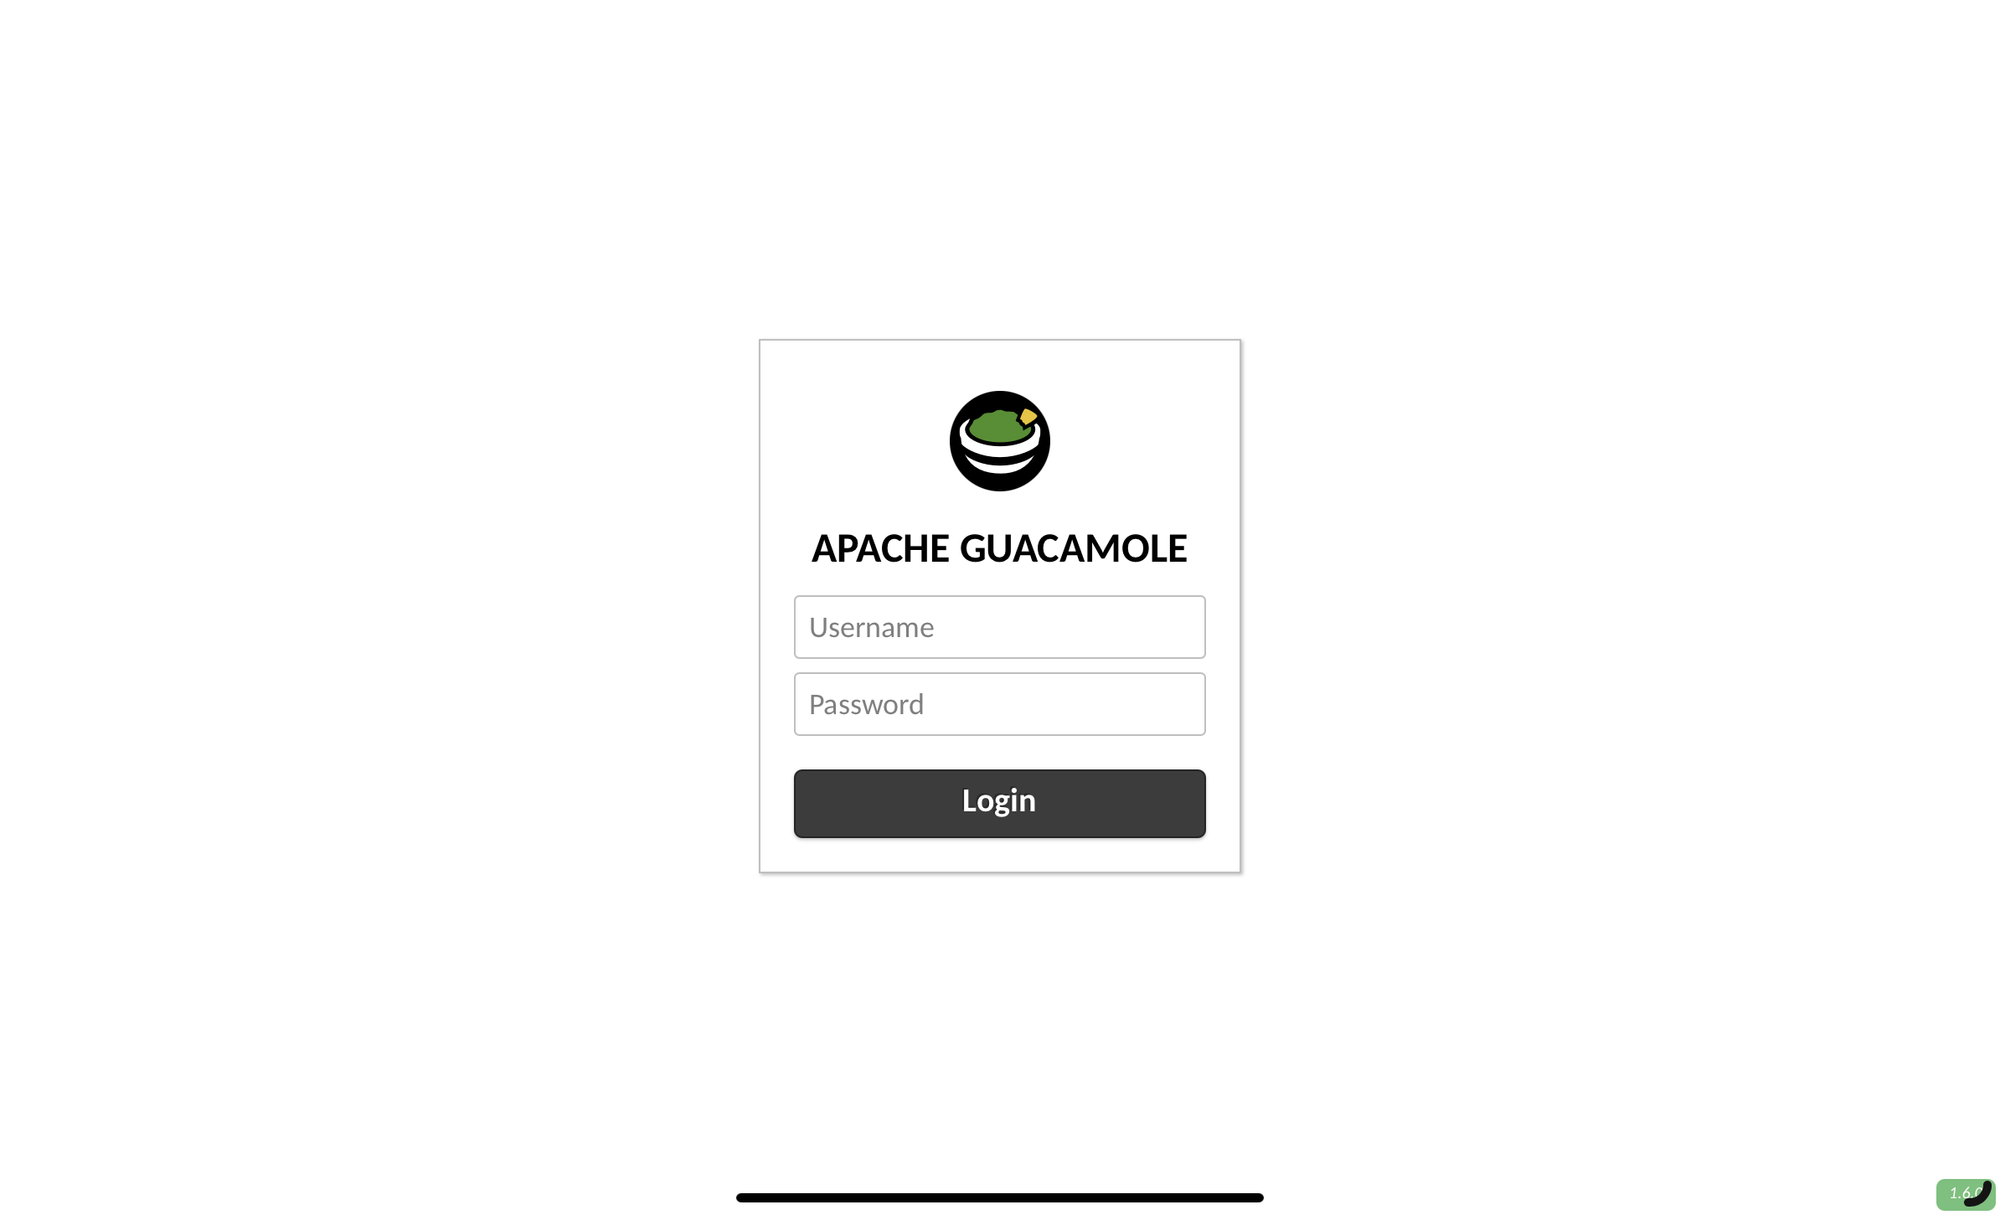
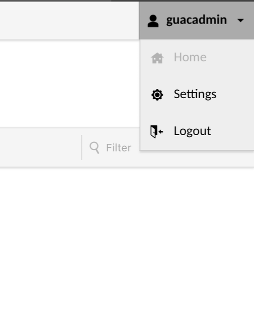
You should be presented with the login prompt like the screenshot below. The default user and password are both guacadmin - you’ll want to change this asap, especially if you’ve opened this to the internet. Once logged in head to settings > users to do this.
Setting up your connections
Setting up a connection is pretty straight forward: just head over to the top right hand corner and choose settings
Now you can browse to the connections tab and add a new connection. In this example I’ve added a VNC connection to another Pi on my network. The connection type will actually default to VNC so you will want to change this setting if using something else.
raspi-config the config is set to IPv6 only, you need to edit /etc/wayvnc/config and change address to 0.0.0.0 from the value ::, this will save you time debugging why it’s not working!

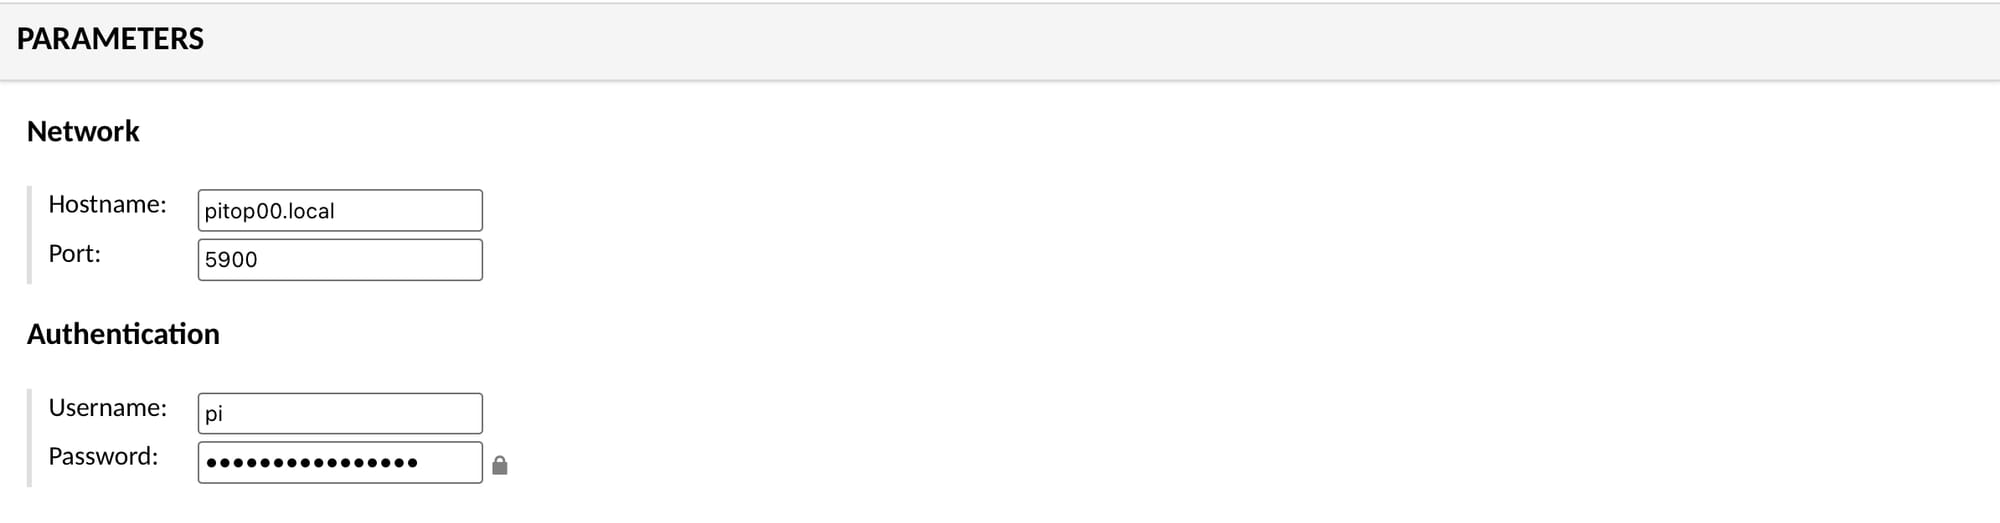
Adding the settings for a remote host on VNC
I added in the name of the connection and then edited parameters to add the hostname, user and password here. That was all that was needed, but you can add things like setup connection, disable copy paste, and tweak the compression settings, if you want to.
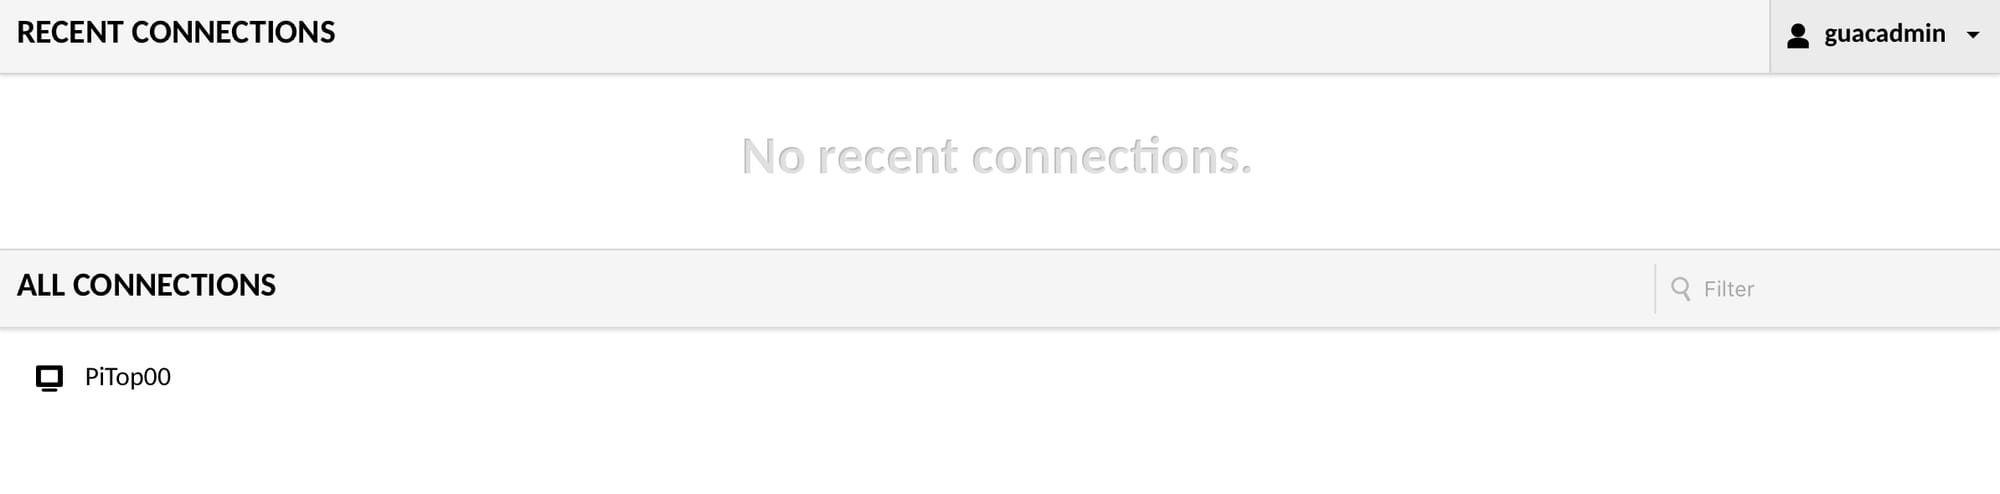
Now head to your top right hand menu again and click Home. You should see a section where you can now click on your hostname and start the session. In the example screenshots below you can see the connection is now listed and, once clicked to connect, I get a full desktop session.

My login options
You can also add settings for an SSH connection which will give you a handy web GUI for SSH.

Conclusion
This wasn’t the easiest thing to get running, but I’ve now made it pretty straight forward for you. There’s a compose file, initial DB to load and even docker images. As an access solution it works well and there’s a host of config settings I’m yet to try that might improve performance for VNC which is a little bit laggy, but in general this works and should at least now be a lot simpler to deploy, meaning you can take control of your own remote access solution and not rely on a third party to keep you safe. You can even use this setup to connect to a window machine on your network via RDP which is much snappier than the VNC option.
Do be warned though you are responsible for making sure you patch this system to keep it secure and if you don’t have a static IP address, you’ll need some sort of dynamic DNS provider so you can always get to your systems.
Pro’s
- Private and secure
- Gives you access to multiple systems in your home lab behind one network connection.
- Automatic banning of addresses that fail auth
Con’s
- You need to handle dynamic IP’s
- Guacamole -> VNC seems really laggy
- Maybe configuring XRDP or wayland equivalent would be better
- Limited supported protocols
PiSource Source
| Easy of Setup | Features | Ease of Use | Extendability | Total |
|---|---|---|---|---|
| 7 | 5 | 5 | 4 | 28/40 |